The process of making dentures takes place in several stages. The first is taking a cast (impression). The subsequent ease of use of prostheses depends on how professionally this work is carried out.
You should not chase a low price; it is important to focus on the quality of work. In common practice, with rare exceptions, the dental technician does not see the patient. And he creates a prosthesis only on the basis of a cast. For this reason, the quality of the impression directly affects the comfort of wearing the orthopedic structure.
In our MK Technology clinic you will be offered several options for taking an impression before prosthetics. They may differ in cost, material used for taking the impression, and procedure time. The final decision on choosing the method of taking an impression will be yours, depending on your expectations, financial capabilities and the type of planned prosthetics.
Price for taking an impression
| Taking an impression from one jaw with alginate mass | included in the cost of prosthetics |
| Taking an impression from one jaw using C-silicone | included in the cost of prosthetics |
| Taking an impression from one jaw using A-silicone | included in the cost of prosthetics |
| Taking an impression from one jaw using an individual tray | included in the cost of prosthetics |
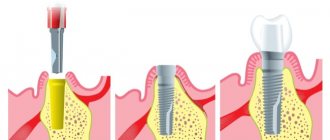
| Taking an impression from one jaw of a tray with an implant using the open method | included in the cost of prosthetics |
| Taking an impression from one jaw with implants using the closed method | included in the cost of prosthetics |
| Taking an impression from one jaw to make a silicone key | included in the cost of prosthetics |
| Trephination of tooth, artificial crown | 1 000 |
| Definition of bite | included in the cost of prosthetics |
| Determining the type of closure of the dentition using a facebow | included in the cost of prosthetics |
| Study on diagnostic jaw models | 2 000 |
| Study on diagnostic models of jaws with wax-up (WAx-Up) of the future prosthetic design for the purpose of planning preparation, aesthetics and function (1 unit) | 1 500 |
| Determination of occlusion by fitting in the oral cavity the result of a wax-up (Moke-Up) made of temporary composite material, planning aesthetics and function (1 unit) | 2 500 |
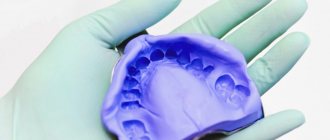
A dental impression is the basis of the future prosthesis. You can make a plaster model only with a high-quality cast. The model, in turn, is used to create complex orthopedic structures.
They are used for the production of:
- removable or fixed dentures
- crowns
- bridges
- individual abutments
- braces used for malocclusion
- trainers, also used in the treatment of malocclusion
The more complex the orthopedic design, the more accurate the impression must be made. Errors when transferring an impression into plaster and subsequent digitization can be so great that the adjustment of the prosthesis is carried out in several steps.
Advantages and disadvantages
The advantage of alginates is the viscosity of the structure, provided, of course, that the prescribed proportions are observed. Also, the accuracy of conveying the relief of the prosthetic dental bed. The material is elastic to obtain an impression of the undercut. Alginate material is stored indoors, but in tightly closed packaging.
Alginate materials have a relatively low cost, but if used correctly, high-quality plaster models can be obtained. Thus, these materials not only accurately represent the prosthetic bed and are easily separated from the plaster model, can be disinfected to a limited extent and are quite elastic in structure, but also, most importantly for dentists, they are easy to use.
When casting plaster models, it is recommended to use them as quickly as possible. This leads to difficulties with disinfection of the material.
The hardening reaction begins immediately when the powder and water are mixed. The result of the reaction is a material with an irreversible three-dimensional structure. Therefore, alginates are unable to return to their previous state and are used once. They also do not adhere well to a spoon, take time to shrink, and have low tensile strength. However, the latter is quite relative. Sometimes it even turns, on the contrary, into an advantage.
Moreover, the time during which the alginates harden will directly depend on the mass fraction of free calcium ions in the mixture. Thus, by adjusting this ratio, it is possible to change the rate of hardening of the impression mass. Typical working time for alginate materials is two to five minutes.
Types of materials for taking dental impressions
Doctors use only modern and high-tech materials. Among the large selection offered by the market, the doctor focuses on the clinical situation and the specific purposes for which the impression will be used in the future.
Main criteria for material selection:
- Impression accuracy. In particular, it is necessary to accurately convey the contours of soft tissues that will be in direct contact with the prosthesis.
- Resistance to deformation after making an impression.
- The material should not be subject to shrinkage after contact with the external environment (air, light), and when exposed to an aggressive environment in the oral cavity.
Silicone-based materials are popular. They are quite plastic, so they allow you to achieve an accurate impression of all areas of the teeth, including the gingival areas. Most often they are used to create clasp models and ceramic crowns. However, it is necessary to note a significant drawback of such material - shrinkage after sixty minutes.
What are “alginates”
Alginate materials are produced on the basis of alginic acid, which is a product of the processing of seaweed. Alginic acid does not dissolve in basic organic solvents, including water, but alginates of its salt still readily dissolve in water, releasing viscous sol-gel substances. It is this property of alginates that allows them to be widely used in production.
Preparing to take an impression
To create a high-quality impression, proper preparation is necessary. The quality of the impression depends on how carefully the preparatory work is carried out.
- Preparing the oral cavity. Drying using special tools and cotton swabs. At this stage, the specialist achieves the lowest possible humidity in order to avoid a negative reaction of the impression materials.
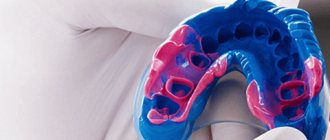
- Selection (or production of an individual) orthopedic spoon. Spoons are made from various materials, including metal. Different spoons are used for the upper and lower jaws. There are times when it is necessary to make a spoon individually. This naturally lengthens the time spent on prosthetics and increases the cost of the preparatory stage.
- Spoons can be made of metal or other material and intended for the upper or lower jaw. In some cases, it is necessary to make a custom spoon.
Beneficial features
Alginate masks have the following positive effects on the face:
- relieve inflammation;
- nourish the skin and restore its protective function;
- constrict blood vessels, causing minor irritations to disappear;
- remove harmful substances;
- normalize the balance of minerals at the cellular level;
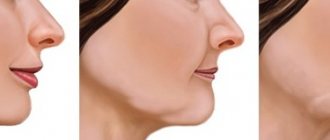
- break down excess fat, which effectively eliminates double chin;
- improve complexion;
- eliminate swelling;
- get rid of wrinkles and folds;
- make the skin elastic and smooth.
To get only the benefits of the procedure, you need to properly prepare the product and know how to dilute the alginate mask.
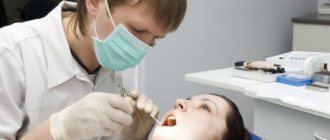
How is the impression taken?
When the spoon has already been selected, the doctor performs the following manipulations:
- Using a spatula, the selected material is mixed.
- The mass is placed in a spoon, inserted into the mouth, and the spoon is pressed against the alveolar process. When is an impression taken from the lower jaw? press first in front, then behind. If they work with the upper jaw, then they act in the reverse order.
- To harden the mass, leave it in the mouth for no more than five minutes. During this time, the impression hardens and preserves as accurately as possible all the features of the patient’s jaw.
- The edges of the impression are formed by the movements of the patient's tongue and lips.
- To avoid deformation of the impression, it is removed in one sharp movement.
- After washing, the impression is immersed in a special solution.
How to get rid of bubbles/lumps and make the mass homogeneous
- Pour in water, carefully mix the powder; make sure everything stays in the cup.
- When all the powder is mixed with water, vigorously spread it with a spatula along the side of the cup several times. This way you will get rid of lumps.
- As soon as the mass becomes homogeneous, i.e. there will be no lumps left in it, scoop it onto a spatula and spread it over the entire surface of the wall of the cup. This way you can expel all the air bubbles from the mass.
- The mass smeared over the entire surface of the cup wall must be collected onto a spatula in one movement. Now you can apply the mixture to the impression tray. There the mass can be smoothed out to remove any remaining bubbles.
Advantages
Before diluting an alginate mask, you need to know about some of its advantages. So, it is suitable for any skin type. It has virtually no contraindications. After using the product, the positive effect will instantly be reflected on the skin. In addition, the advantages of the mask are:
- Guaranteed positive result. Wrinkles and folds are smoothed out. Skin looks fresher and more elastic. Pores become smaller.
- Availability of the product. Powder for making a mask can be bought at any pharmacy.
- Such cosmetics are a conductor of beneficial substances. They greatly enhance the effect of various tonics, serums and creams.
The product has great benefits. A similar procedure is carried out in any beauty salon, because the positive effect of its use is immediately noticeable.
Before preparing the product at home, you need to familiarize yourself with the intricacies of the process. And then we will find out how to properly dilute the alginate mask.
How to work with the material to make an impression?
Of course, you can make a cast yourself. But it is not recommended to use it to form a prosthesis, since a person without special training is unlikely to be able to make an accurate impression of the required part of the jaw.
Algorithm of actions:
- Selecting a spoon for applying the mixture, which are divided into groups (universal and special, plastic and metal). It is better to use metal ones. This ensures that they will not become deformed while the material is being applied to the patient's teeth. You also need to pay attention to the size of the spoon. It is desirable to have thickened sides with a total width of 5 mm larger than the tooth.
- The choice of the type of alginate mass depends on the scale of the work, as well as the degree of damage to the jaw.
- The mixture is prepared in strict accordance with the instructions. The ingredients are distributed using measuring containers. Incorrect use of materials will affect the hardening time of the mass, as well as its ductility. When kneading, use a rubber bowl.
- Applying the mass. An impression is made not only of the jaw where the prosthesis will be installed, but also of the opposite side. The material is also applied to adjacent teeth in order to calculate the distance between the teeth and the maximum size of the future prosthesis. For the upper jaw, the inner part of the tooth is covered first, and for the lower jaw, the outer part is covered.
- Removing the finished print is done in one strong movement to prevent deformation.
Alginate impression mass, ready-made impressions
It is best to use the impression to make a prosthesis during the first 30 minutes. But if transportation is necessary, the impression is wrapped in a damp cloth and placed in a plastic case.
Reviews
The opinions of women who have tried to use an alginate mask at least once are only positive.
They all agree on one thing: the product has an excellent effect after the first procedure. The skin becomes elastic, the facial contour is tightened. This allows women to feel much younger.
In combination with other cosmetic products, this mask provides a noticeable increase in the effect.
An alginate mask is a product that has a positive effect on the skin, it is affordable and can be used at home. Regular use of the described mask will help you maintain beauty and youth for a long time.
How to apply the mask?
How to dilute and apply an alginate mask? It’s quite simple to make: you just need to combine sodium alginate with mineral water in a 1:2 ratio. Once you have a homogeneous mass, you can add additional components (chamomile extract, essential oils, etc.) and mix thoroughly. Basic rules and recommendations for the procedure:
- The product is applied to clean skin. Before applying the mask, you can use tonic, lotion or pre-peeling.
- Under the mask, especially the eye and neck area, the skin must be treated with serum or a mixture of oils. Lubricate eyebrows and eyelashes with rich cream.
- The procedure is best performed in a lying or standing position, but the head should be tilted back. The face should be in a relaxed state.
- For one application, 20-25 g of product is enough. It is applied along the massage lines with a spatula or brush. The process must be carried out quickly until the mask hardens. You can use the help of an outsider.
- After 5-7 minutes, the product will begin to thicken and acquire the density of rubber. It is best to apply nourishing cream to the edges, which will make it easier to remove the mask.
- The procedure lasts 20-30 minutes. And then the mask is removed from bottom to top.
- The face is wiped with a tonic that soothes the skin. Then lubricate with nourishing cream.
The frequency of use of this mask depends on the type of skin. A positive result is noticed after the first procedure. Cosmetologists advise making masks for skin rejuvenation 2 times a week for 2-3 months. After 6-10 procedures, a break is required. This allows you to consolidate the positive result and prevent addiction.
Differences between alginate and non-alginate masks
Kazmulka/Depositphotos.com
Are alginate masks really somehow critically different from any others or is it just a marketing ploy?
If we talk about the most common masks produced by cosmetic concerns, they are unified. Developed - tested - sold. This means that everyone will buy them, they are inexpensive, easy to use, and whether they will help or not is a matter of chance, although at the testing stage they showed some results in relation to the existing problem.
Alginate masks are not much different from the most common ones, except that they must be prepared from the proposed ingredients, and the process of application and removal is more complicated. That is why alginate masks are considered professional cosmetics and in salons they are applied according to all the rules so that there is a truly noticeable result. These masks work better when applied systemically, largely due to the properties of alginates, which provide a rejuvenating effect.
Therefore, if you are planning to buy an alginate mask and use it at home, then the price-quality ratio is quite reasonable, and you will be more satisfied with the results than when buying the simplest face mask for the same money.
Preparation of alginate mixture
Take a container and fill in the required volume of alginate. Then stir the mixture with a hand mixer (if you have one) and beat once with a beater.
Please note: small lumps in the wet mixture are not a problem.
Ratio:
- 20 ml water + 9 g alginate;
- 100 ml water + 45 g alginate;
- 1100 ml water + 500 g alginate.
Allow about 45 seconds for mixing and about 1 minute until you place the sample in the container.
The setting time of the alginate mass depends on the temperature of the water used . Warm water gives the alginate a shorter setting time.
Now immerse the sample in the alginate mixture without touching the edges of the container. When the mass becomes hard (rubber-like, elastic) and no longer sticky, carefully lift/pull the sample out of the frozen mass.
Features of alginate masks
1. The finer the powder the dry mask is, the higher its quality. If the powder is more like sand, then such a mask will not fit well on the skin and form lumps.
2. A gel alginate mask does not dry out like a powder mask and is washed off with just plain warm water. It is convenient to take it on the road or use it in cases where it is not possible to dilute powder.
3. There are practically no allergies to alginate masks. They contain only one allergen - iodine, extracted from algae. Therefore, if you are allergic, but you are not allergic to iodine, then feel free to use alginate masks - everything will be fine.
LiveInternetLiveInternet
Alginates: Instructions for use
Alginate impression compounds are cheap and easy to work with.
Provided they are properly stored and used, alginates make it possible to obtain fairly accurate plaster models.
These models can be used as:
- Documentary models showing the state of occlusion before, during and after orthodontic and orthopedic treatment.
- Diagnostic models that can be used to make a more accurate diagnosis and determine a treatment plan. Any treatment options can be clearly presented on these models, allowing the doctor and patient to choose the optimal treatment plan.
- Auxiliary, occlusal models of antagonists in the manufacture of various orthopedic structures.
- Working models for the manufacture of stamped-soldered structures, removable laminar dentures, orthodontic appliances, individual impression trays.
Basic information about alginates.
Alginates are elastic impression materials. The raw material for the production of alginates is seaweed.
The alginate material powder contains sodium or potassium salts of alginic acid (15%), which are highly soluble in water, calcium sulfate (about 12%), and sodium phosphate – a retarder (2%). Inorganic fillers (talc, zinc oxide) determine the viscosity of the material and its stability after hardening and make up the bulk of the powder (70%). Additionally, alginate powder contains small amounts of colorants, flavors, fragrances and fluoride compounds to enhance the surface strength of the plaster model.
Unlike salts of alginic acids with monovalent metals (sodium Na+), salts of alginic acids with bivalent metals (calcium Ca2+) are poorly soluble in water due to cross-links that occur between the polymer molecules of alginic acids.
If you add water to the alginate powder, the sodium salts of alginic acid and calcium sulfate come into the solution. These salts dissociate into sodium ions (Na+) and alginic acid on the one hand and into calcium ions (Ca2+) and sulfate ions (SO42-).
After dissociation, it becomes possible for alginic acid to react with the released calcium ions. As a result, individual chains of alginic acids are cross-linked with calcium ions, which leads to the formation of an elastic gel and polymerization of the mass.
This reaction occurs very quickly, so the presence of reaction inhibitors is necessary for ease of operation. The moderator, sodium phosphate (Na3PO4), is the first to bind most calcium ions, forming slightly soluble calcium phosphate (Ca3(PO4)2). In this case, the setting reaction of the alginate is inhibited until the retarder reacts completely. The impression material manufacturer can determine the cure time of the product by increasing or decreasing the amount of retarder in the powder (usually 1-2%). Typically, a distinction is made between rapidly and normally hardening alginates. Setting time can vary significantly depending on the temperature of the mixing water. Cold water increases working time, and warm water shortens it.
The viscosity of the kneaded alginate material largely depends on the amount of water added during kneading. Therefore, it is necessary to adhere to the proportions of water and powder suggested by the manufacturer.
Detail accuracy
The accuracy with which alginate impression compounds are able to convey detail is determined by the size of the powder granules and the type of macromolecules formed. The accuracy limit for small object transmission is approximately 50 m (according to ISO 1563). This detail accuracy is not as good as that of silicone impression materials, so alginates should not be used to take impressions for working models on which inlays, crowns and bridges will be made.
Water in the polymerized alginate is in an unbound form between the macromolecules. Therefore, depending on the conditions under which the finished impression is stored, water may be easily absorbed by the material if there is excess water, or the material may lose water and dry out. Accumulation or loss of water causes changes in the original dimensions of the casts, so plaster casts should be obtained immediately after the casts are taken.
Due to the presence of a cross-linked macromolecular structure, the polymerized alginate material has elasticity, which allows the imaging of undercut areas. However, this elasticity is even less than that of hydrocolloid impression masses. Alginate impression material fails at 50% pressure and at relatively low tensile loads. Therefore, extensive undercuts, such as wide interdental spaces and spaces under pontics, must be isolated in the patient's mouth before taking an alginate impression.
It is also necessary to remember that the alginate layer between the teeth and the impression tray must be at least 5 mm thick. Plastic impression trays should not be used.
This requirement is explained by the fact that the elastic deformation of the alginate during impression removal will be so great that the original shape of the impression will not be completely restored and permanent plastic deformation will remain.
The problem with disinfecting alginate impressions is that alginates can only remain in an aqueous environment for a short time without significant water absorption and dimensional disturbance. However, research shows that the use of sodium hypochlorite (household bleach) effectively disinfects alginate impressions within minutes without degrading the quality of the impressions.
Proper storage of alginate materials
Alginate powder in its original packaging can be stored for up to 3 years at room temperature (23? C). Open packaging must be closed after taking the powder. Alginate powder should always be removed from the packaging only with dry tools.
Impression trays can be standard – industrially produced or individual. Standard impression trays can be plastic or metal, have different designs and shapes, solid or perforated walls.
Metal impression trays have the advantage that they can be sterilized and can be used repeatedly, while plastic trays are designed for single use, but plastic trays are not rigid enough and can become deformed.
Alginate material has poor adhesion to the walls of the tray, so mechanical retention must be used.
There are several options for obtaining mechanical retention. There are standard spoons that have perforated walls or thickening, a rim along the edge of the spoon. Impression trays with smooth sides can also be used with minor modifications. You can cover the sides of the spoon with a strip of plaster or wax.
There are special preparations for obtaining additional chemical adhesion of the impression material to the tray.
When using perforated trays, it is important that when removing the tray from the mouth, the material does not tear off the tray, since repositioning the impression back onto the tray is difficult.
When choosing the spoon size, make sure it is large enough. The alginate layer must be at least 5 mm thick. If this rule is not followed, after removing the impression from the mouth, residual deformations may occur. If the spoon is wide enough but too short, it can be lengthened using Stens.
Use of impression material
To obtain the correct consistency of the material, use only dosing containers for water and powder supplied by the manufacturer. The powder should not be poured in a heap. Mixing the material “by eye” leads to an incorrect consistency of the mass.
Mixing should be carried out intensively for the time specified by the manufacturer until a homogeneous paste-like mass is obtained. The best option is to use an alginate mixing machine.
Immediately before taking an impression, it makes sense to apply a small amount of mass using your finger to the fissure area of the chewing teeth, as well as to the interdental spaces of the area of interest, to improve the quality of the impression.
When taking an impression of the lower jaw, it is necessary that the mouth is covered as much as possible, because when the mouth is open, the impression can be distorted by tense muscles.
The impression should remain in the mouth until the material has completely set, in accordance with the time specified by the manufacturer. If the impression is removed from the mouth too early, the polymerization reaction will not occur completely, resulting in permanent plastic deformation of the impression.
The best way to remove the impression from the mouth is to press on the excess material in the lateral areas of the vestibule of the mouth. An attempt to remove the impression by the handle of the tray may result in the mass being torn away from the impression tray.
Evaluation of the resulting cast and further work with it
After removing the impression from the mouth, it is necessary to wash away traces of saliva and blood under cool running water. After this, the cast is assessed for suitability for further work - whether the dentition and toothless areas are well defined, and whether there are any large air bubbles.
In order to reduce the risk of possible tearing of the alginate material in the distal parts of the impression tray in future work, excess impression material along the distal edge of the tray should be trimmed. If this cannot be done without damaging important areas of the impression, then it is necessary to always place the impression on a hard surface only with the impression material facing down.
Ideally, alginate impressions should be cast with plaster for the first time 30 minutes after they are taken. If impressions are cast in a dental laboratory, then during transportation the impression should be in a plastic bag along with a piece of damp tissue. This piece of fabric will prevent the impression from drying out. At the same time, the fabric should not touch the alginate to prevent local swelling of the material.
Gypsum is the material of choice for casting alginate impressions. Other materials for casting impressions - cements, plastics, ceramic masses, metals, alloys (galvanoplastic casting, spraying) should not be used to obtain anatomical models from alginate impressions.
Gypsum is calcium sulfate hemihydrate in crystalline form (CaSO4 x 2H2O).
According to ADA and DIN standards, there are 4 types of medical plaster.
- type I - impression plaster
- type II - alabaster
- type III - dental plaster
- type IV - dental super plaster
Type III and Type IV are used for casting alginate impressions.
Preparation of alginate impressions
Before casting, it is recommended to sprinkle the inner surface of the cast with gypsum powder. After 1-2 minutes, the impression must be thoroughly rinsed under running water. This will clear the impression of residual saliva and blood and bind the free chains of alginic acids.
If you have free-standing teeth, especially with a large clinical crown, to prevent them from breaking off when opening the impression, it is necessary to place them in special pins.
Gypsum can be mixed manually in a smooth-walled rubber cup or automated using a vacuum gypsum mixer.
All tools used for mixing plaster must be absolutely clean. Pieces of plaster left over from previous mixing can deteriorate the surface of the model and speed up the setting time of the plaster.
It is necessary to strictly follow the dosage of water and plaster specified by the manufacturer when mixing. The mixed gypsum must be homogeneous, creamy in consistency, and free of air bubbles.
The first step is to apply a small amount of plaster to the smooth surface of the impression, next to the teeth (usually the palatal surface of the upper jaw and the hyoid slopes of the lower jaw). “Tap” the cast well so that the plaster slowly fills the dentition without air pores; if necessary, add plaster little by little. It is better to do this work on a vibrating table. If it was not possible to avoid air pores, and the plaster quickly covered the tooth marks, then turn the model over and knock the liquid plaster back into the cup and repeat everything again. Add plaster until it fills the cast to the brim. After the plaster begins to thicken, form a base from the plaster and turn the cast over.
Once the plaster has hardened, open the model immediately. As a result of drying and contact with the plaster, the alginate loses water and becomes less elastic, so the more time passes, the more difficult it becomes to separate the cast from the model. As a result of alginate shrinkage, free-standing teeth can easily break off when the model is opened. Therefore, a cast alginate impression should never be left overnight.
When opening the impression, if possible, first remove the impression tray and then loosen and remove the alginate mass.
The finished model must be trimmed. The base should be flat and its plane parallel to the occlusal surface. The side surfaces must be trimmed so as not to damage the transition folds.
Possible errors when working with alginate impression materials.
The alginate cast came off the tray.
- Insufficient mechanical retention or chemical adhesion of the alginate material to the tray.
- Improper storage of alginate impression.
- Use impression trays that have perforated walls or a thick rim around the edge of the tray. Impression trays with smooth sides must be covered with a strip of plaster or wax.
Use impression tray adhesive.
- Excess impression material along the distal edge of the tray should be trimmed. If this cannot be done without damaging important areas of the impression, then it is necessary to always place the impression on a hard surface only with the impression material facing down.
- Alginate material is mixed incorrectly. The material is too fluid.
- Too much pressure when inserting the spoon.
- The impression tray is too small or was not inserted straight.
The impression material is “pierced” by the teeth to the bottom of the tray.
- Follow the manufacturer's instructions for mixing alginate material.
- The pressure when inserting the impression tray should be moderate.
- Try on the impression tray before taking an impression.
There should be a space of at least 5 mm between the sides of the spoon and the teeth.
Porous surface of a plaster model.
- The hardening of the plaster is impaired due to the presence of free alginic acid on the surface of the impression.
- Water settles on the occlusal surface when the cast cast with liquid plaster is turned over.
- Deterioration of the quality of gypsum when stored in open packaging.
- Inappropriate type of plaster for casting alginate impressions.
- Before casting, the inner surface of the cast should be sprinkled with gypsum powder. After 1-2 minutes, the impression must be thoroughly rinsed under running water. This will clear the impression of residual saliva and blood and bind the free chains of alginic acids.
- Do not turn the cast over until the plaster has hardened sufficiently.
Inaccurate or incomplete representation of occlusal surfaces on the alginate impression and plaster model.
- Insufficient pressure when inserting an impression tray, especially a perforated one.
- Alginate material is too liquid.
- Use non-perforated impression trays.
- Follow the manufacturer's instructions for mixing alginate material.
- Apply a small amount of alginate mass to the fissure area of the chewing teeth, as well as to the interdental spaces of the area of interest, before inserting the tray.
Excess plaster (bubbles) on the occlusal surface of the plaster model.
- Air bubbles in the alginate impression.
- Apply a small amount of alginate mass to the fissure area of the chewing teeth, as well as to the interdental spaces of the area of interest, before inserting the tray.
Breakage of free-standing teeth when opening a cast.
- The alginate cast remained on the model too long and lost its elasticity due to water evaporation.
- The teeth have a pronounced equator/undercut.
- Open the impression immediately after the plaster has hardened (approximately 30 minutes).
- Before opening the impression, it is necessary to slightly rock the tray on both sides. Pressure on the handle of the impression tray should be avoided.
- If there are free-standing teeth, especially with a large clinical crown, to prevent their breaking, it is necessary to place special pins in the cast.
Prosthetics made from alginate impressions fit the plaster model but do not fit in the mouth.
Permanent deformation of the alginate cast occurred.
- Improper storage of the cast - its swelling when stored in water, or drying out and shrinkage of the cast.
- The alginate cast came off the impression tray (usually in its distal part), which was not noticed.
- Excessive elastic deformation:
1. The cast was removed from the mouth incorrectly.
2. The alginate layer is too thin due to the small size of the spoon.
3. Too much pressure on the impression tray when setting the alginate material.
- Casts should be cast in plaster for the first time 30 minutes after receiving them. When transporting, the impression must be in a plastic bag.
- Excess impression material along the distal edge of the tray should be trimmed. Always place the impression on a hard surface with the impression material facing down.
1. When removing the impression from the mouth, the pressure on the tray should be symmetrical.
2. Use the correct size impression tray.
3. After inserting the impression tray into the mouth, leave the impression until the alginate material is completely polymerized without applying additional pressure
Those who want to help the site financially can throw a coin into the WM piggy bank (yellow card) or send an SMS with a wish (blue card).
The money will be spent on developing the site.
Thanks in advance! ORDER ON THE OFFICIAL STORE WEBSITE
