Rotary dental instruments include burs, cutters, discs, abrasive heads, and polishers used in dental practice for processing hard and, in some cases, soft tissues of the maxillofacial area.
Regardless of the functional purpose of rotating dental products, their design includes a so-called working part, with the help of which the material being processed is removed, and a shank, designed to secure the tool in the dental handpiece. The surface of the working part can be made of various materials, for example, steel, diamond chips, corundum, silicone, polymers, natural pile, artificial bristles. These circumstances must be taken into account when choosing methods and means of processing products before subsequent use.
In accordance with the provisions of Ch. V SanPiN 2.1.3.2630-10 “Sanitary and epidemiological requirements for organizations engaged in medical activities” all dental instruments that come into contact with the wound surface, blood or injectable drugs, as well as those that come into contact with the mucous membrane during operation and can cause its damage, must consistently undergo disinfection, pre-sterilization cleaning and sterilization.
General requirements for compliance with sanitary standards
Today, the main requirement in dentistry is the use of disposable materials for patient treatment. Before the appointment, all auxiliary materials must be replaced, including gloves and a doctor’s cap. Reusable instruments must be removed from special sterilization bags that indicate the date and time of their sterilization.
Some patients are so eager to see a doctor that they want to enter the office immediately after the previous patient has left. They do not think that after seeing a patient, medical workers disinfect the office. Therefore, after one patient leaves, all surfaces with which he came into contact or could hypothetically come into contact are wiped with a disinfectant solution. Disposable instruments are disposed of in accordance with all sanitary standards. During the entire reception, the bactericidal recirculator lamp should be running, which can operate in continuous mode (without stopping).
How instruments are sterilized in dentistry - to protect the health of patients and medical staff
During dental treatment, a specialist inevitably comes into close contact with the patient, or more precisely, with the mucous membrane and hard tissues of his oral cavity. And here you need to understand that infected patients also seek medical help. At the same time, in his work, the doctor uses special instruments, which, if the rules of asepsis and antisepsis are violated, can become a carrier of dangerous infections. Therefore, adherence to the principles of disinfection in dental practice is the basis. Read further in this article about how dental instruments are sterilized in dentistry.
Modern processing methods make it possible to reduce to zero any risk of transmission of infection.
Disinfection and cleaning measures
Instruments that have come into contact with the patient's saliva are a source of increased danger. Therefore, immediately after use, the instrument is loaded into a container with a disinfectant and cleaning solution. Then, it is processed in a thermal disinfector.
The next stage of processing is cleaning. It helps remove remnants of medications and fatty contaminants. The best method of cleaning is mechanical processing in special machines. This is the only method that allows complete removal of saliva and blood residues from the surfaces of instruments.
Pre-sterilization cleaning of instruments
All instruments are kept in a disinfectant solution of 3% “Aminaz Plus 0.4%” for 15 minutes, followed by mechanical treatment. Burs, files, brushes and other instruments are soaked for 30 minutes in Desco Drill solution. Next, the instruments are immersed in an ultrasonic bath for 15 minutes - this guarantees the quality of pre-sterilization cleaning.
Quality control of pre-sterilization cleaning is carried out by performing azopyram and phenolphtolein tests. Clean instruments are packaged in individual craft bags “Cleene Pack”, “PicPack”, “Euronda”, “Sigma”. Sterile bags are opened only when the patient is seen by a doctor.
Every six months, the solutions are changed from “Aminaz Plus 0.4%” to “BabyDez Ultra”, “Desco Drill” to “Rotasept”.
Sterilization
Sterilization is the final stage of processing medical instruments. There are two main methods - steam and air. Steam sterilization uses:
- autoclave;
- wet sterilizer;
- hot steam sterilizer.
This method works using steam from distilled water under high pressure at temperatures up to 135o.
Air sterilization is carried out using a dry-air sterilizer or a dry-heat oven. The air temperature in such devices reaches 180°.
Sterilization takes place in several stages:
- steam treatment;
- sterilization;
- drying.
The entire procedure takes approximately 1.5 hours. After this, each instrument is placed in a disposable sterilization bag, on which the date and time of packaging is written. Sterility in such bags is maintained for about six months.
Methods for sanitizing instruments in the Da Vinci aesthetic dentistry studio
Our clinic is a modern dental center. And we approach the issue of patient safety thoroughly. Therefore, cabinet processing necessarily includes the following steps:
- disinfection of all surfaces in the office before each patient;
- placing all instruments related to the patient in a special sterilization bag;
- issuing disposable “clothing” to those coming for treatment - a disposable napkin, a cap;
- the bactericidal lamp operates throughout the entire appointment;
- sterilization of instruments after each use;
- The doctor changes gloves and cap after each appointment; gloves are also changed if the doctor leaves the patient. In our clinic, it is customary to do this in front of the patient so that he has no doubts about the complete safety of the entire treatment.
- During X-ray procedures, the device’s sensor is placed in a disposable bag, which is immediately thrown away after use.
We care about the health of our patients and strive to ensure that treatment is as safe as possible.
Add a comment
Leave your comment
Stages of sterilization of dental instruments
Very high demands are placed on the sterilization of instruments in dental clinics. To comply with them, it is necessary to properly prepare the tools for processing.
In this article we will talk about sterilization processing of instruments and materials.
The full cycle looks like this: disinfection → pre-sterilization cleaning → packaging → autoclaving → storage of sterile instruments.
Stage No. 1. Disinfection.
Disinfection is the first stage of preparing instruments.
There are two ways to process tools – mechanical (manual) and automatic (using specialized equipment).
Let's consider a mechanical method of disinfection of different types of instruments.
All dental instruments - burs, handpieces, etc. - are subject to disinfection. However, not all are subject to the same treatment.
All metal (for example, burs), plastic and glass instruments can be soaked in a disinfectant solution, but tips are strictly prohibited.
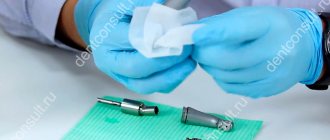
An alternative method of disinfection for handpieces is special wipes, such as Eco Jet. The wipes contain aggressive substances, so be sure to wear rubber gloves before use.
Important! Always follow the manufacturer's recommendations regarding dosage, solution concentration and exposure time for instruments. This will protect them from damage and premature wear.
Stage No. 2. Pre-sterilization cleaning.
At this stage, any contamination or residual disinfectant is removed from the products. The cleaning method depends on the texture of the products.
Tools with a smooth surface (for example, spatulas) can be cleaned with a special brush under running water.
And instruments with a ribbed or similar surface (for example, diamond burs) are cleaned only in equipment - an ultrasonic cleaner (bath). The fact is that the diameter of the bristles and threads on the surface of the tools, as a rule, do not match, and high-quality cleaning is impossible.
How does ultrasonic cleaning work? The device is a housing in which a container is placed. The tool is loaded into it, then the container is placed in the sink body. The cleaning agent is first poured into the device. Then the device turns on, the time is set - and the instruments are automatically cleaned of dirt.
After the cleaning cycle is completed, the instrument is removed from the sink, dried and packaged.
Important! Handpieces and similar instruments must not be cleaned in an ultrasonic cleaner!
Processing of collapsible tips. To easily and quickly clean the tips, choose dismountable models (for example, these are produced by W&H). They can be disassembled into elements and processed each separately.
As we said above, special wipes are used for disinfection.
Here are step-by-step instructions on how to process tools with them:
- Wear protective gloves;
- Disassemble the tip into its components;
- Wipe the surfaces of all elements with a napkin;
- Additionally, rinse the saline supply needles under running water using the needle that comes with the tip - this will thoroughly remove any remaining saline solution from the system.
Once the disinfection and cleaning cycle is complete, reassemble the tip completely and lubricate it.
Important! Be sure to lubricate the tips before packing.
Lubrication of tips. To lubricate the tool, use oil in a cylinder (it contains an attachment for mechanical tips) or in a special apparatus.
Be sure to remove excess oil from the tip. To do this, put it on the motor and turn it on for 30 seconds, wipe it with a napkin.
Stage No. 3. Package.
Manufacturers offer self-sealing bags and packaging devices.
The bags are available in different sizes and widths, so it won’t be difficult to choose one for the size of the tool. Packing products is very simple: place them in a bag, tear off the protective film with a sticky layer and seal the bag.
A packaging machine (for example, from Euronda) allows you to seal the bags yourself, adjusting their width and length. For this purpose, rolls of different winding widths are used (it is selected according to the size of the tools and trays).
Stages of making and sealing bags in a machine:
- Skip the required roll size to match the tool size;
- Pinch it - on the right side of the machine there is a lever that needs to be lowered down;
- Wait for a sound signal and color indication (orange) - this indicates that soldering has been completed;
- Cut the package (to do this, move the lever to the left, which is located on the right side of the device);
- Remove the bag from the machine.
Upon completion of the process, you receive a bag of the size you need, sealed on one side.
Now put the tool in it, wrap it, bring it to the heating element, fix it, press it and wait for the sound signal - and after a second the bag is hermetically sealed.
Self-sealing bags come in a standard length, while with a packaging machine you can adjust the length and width of the bags.
An important step in preparing for autoclaving! The packaging bags have 2 sides - one is transparent film, the other is paper. The paper used is special - with membranes. When you place a bag in an autoclave, the machine pumps the air out of the bag and steam passes through these membranes and sterilizes the items. During drying, these membranes are closed, and you receive a 100% sterile instrument, packaged in a sealed bag.
Therefore, it is important to place the instrument bags correctly on the tray before autoclaving: only with the paper facing up! This is the only way to guarantee high-quality sterilization and drying.
Stage No. 4. Autoclaving.
An autoclave is the most reliable way to sterilize instruments. It guarantees 100% sterility, and in terms of the quality of processing it simply has no equal.
Here are step-by-step instructions on how to sterilize instruments in an autoclave:
- Place trays of products on pallets in the machine;
- Select temperature mode and program;
- Confirm your choice - then the autoclave will perform the entire sterilization cycle automatically.
After the cycle is complete, remove the trays using the holder to avoid getting burned.
Possible mistakes when preparing for autoclaving:
Upon completion of sterilization in the machine, you will receive a completely sterile and dry instrument. But sometimes, after autoclaving, moisture remains in the bag. This should not be the case and means that at some stage you made a mistake.
This situation occurs for two reasons: incorrect placement of the instruments on the tray or incorrect packaging.
What to do to avoid this problem:
- always place bags on the tray with the paper facing up;
- make sure that the packages do not overlap each other, but are located freely on the tray;
- There should be a small distance between the bags for unhindered steam circulation.
After autoclaving, it is necessary to ensure proper storage of sterile instruments. Store it in packages in a dry and dust-free place.
Compliance with all stages of pre-sterilization preparation guarantees the safety of medical personnel and patients of the clinic, as well as the safety of instruments. You can buy the necessary equipment in the online store.
Methods for disinfecting dental instruments
| Disinfection method | Disinfectant agent | Solution concentration % | Disinfection time (min) | Application |
| Physical - boiling. | A) Distilled water. B) Distilled water with sodium carbonate. | 2,0 | 30 15 | Recommended for glass products, metal, heat-resistant polymers. |
| Chemical. | A) Chloramine. | 3,0 | 60 | Products made of glass, corrosion-resistant metal, polymer materials. |
| B) Hydrogen peroxide. | 6,0 | 60 | Products made of glass, corrosion-resistant metal. | |
| B) Neutral calcium hypochlorite | 4,5 | 60 | Products made of glass, polymer materials. | |
| D) Glutaraldehyde. | 2,5 | 60 | Products made of glass, corrosion-resistant metal | |
| D) Formalin. | 4,0 | 60 | Products made of glass, polymer materials. | |
| E) Neutral anolyte. | 0,05 | 180 | Rubber products. | |
| Neutral anolyte. | 0,05 | 60 | Products made of plastic. | |
| Neutral anolyte. | 0,05 | 30 | Glass products. |
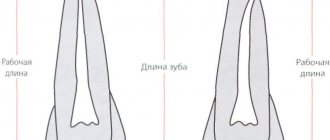
Features of working with endodontic instruments
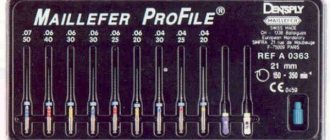
The vast majority of instruments used in endodontic treatment today are disposable. When using them, specialists are guided by two basic rules:
- after use, the product must be properly disinfected,
- after that it must be sent for disposal.
As for reusable items, after each patient they are immediately sent to a disinfectant solution and usually left there for half an hour. After this, ultrasonic cleaning can be carried out, followed by treatment in an autoclave or oven. The method is chosen based on the type of tool used. After the full cycle, the processed items are sent for storage to specialized equipment, which is available in any modern clinic today.
Disinfection of instruments used in therapeutic practice
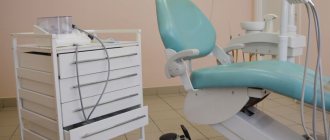
When answering the question about what instruments are disinfected in dentistry, we should immediately say that in the doctor’s office all surfaces are treated at the beginning of the working day. Also, medical staff must clean the dental chair and other surfaces of the equipment used after each patient.
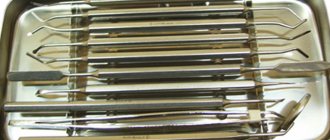
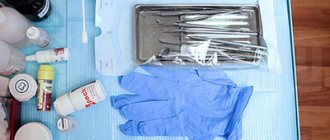
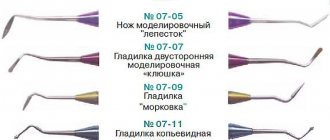
Therapeutic instruments must undergo appropriate multi-stage cleansing. The standard set includes a tray, a trowel, a spatula, an elevator, a probe and tweezers.
