Sterilization is the process of complete disinfection of instruments, during which all microorganisms, as well as their spores, are killed.
Everything that comes into contact with the patient’s biological fluids and is used repeatedly is subject to sterilization. Human immunodeficiency virus, hepatitis B and C, malaria, typhus – this is an incomplete list of diseases that are transmitted through blood. Sterilization is necessary to prevent their spread.
At the Karmen-Med clinic, all instruments are subject to mandatory sterilization. Regardless of the manipulation performed, the dentist always has only clean instruments in his hands. Our patients do not have to worry about their health.
Sterilization methods used in dentistry
Sterilization is the general name for any disinfection process, regardless of the method of removing microorganisms. There are several such methods:
- Mechanical – removal of microorganisms by mechanical action. For example, liquids are passed through special filters that retain particles of certain sizes. Microorganisms can be mechanically removed from objects or surfaces by cleaning, wiping, and sweeping. The method is unreliable and is used in medicine only as a preliminary step.
- Biological - sterilization with antibiotics, is rarely used because it does not affect all pathogens.
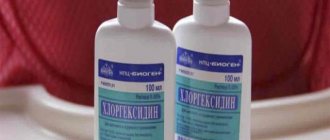
- Chemical is a method of disinfection by applying special solutions or gas treatment. Gaseous ethylene oxide or formaldehyde is used as the latter. Acids with oxidizing agents, detergents, halogens and aldehydes are used as solutions. Most are known antiseptics, such as chlorhexidine or betadine. Used for processing cabinets, surfaces, and apparatus.
- Microwave - in this case, disinfection occurs in a special microwave sterilizer. Microorganisms die under the influence of an electromagnetic field. The method is rarely used in medicine.
- Physical - a method that includes exposure to temperature, pressure or ionizing rays. The most commonly used sterilization is high temperatures (in a dry-heat oven) or high temperatures and pressure (autoclaving). Most tools and materials can be cleaned using these methods. Ionizing radiation is used in factory conditions in the manufacture of sterile products.
Infection safety in a dental clinic: what you need to know
Dentists state that when visiting the clinic, patients increasingly ask questions about how instruments are sterilized and whether they are reliably protected from the transmission of infections. The expert of the Sibmeda portal on sterilization issues is Natalya Zubareva, chief physician of the Zubareva Dental Clinic.
Modern tendencies
“The topic of infection safety in dentistry is very important, so some improvements are constantly appearing in this direction
, - says Natalya Nikolaevna.
“ For example, the majority of instruments in dentistry today are disposable: these are saliva ejectors, gloves, packaging materials, various napkins for processing, separating plates, and so on.”
Each dental clinic today is obliged to comply with the requirements of the Anti-AIDS-Antihepatitis program, which provides for the use of a certain list of disposable consumables.
Changes have also affected modern dental units. If previously they were treated with disinfectant solutions only from the outside, today the entire system of hoses that fit the tip is subject to treatment to prevent the colonization of bacteria.
SanPiNov requirements are constantly becoming more stringent. This can be clearly seen if we compare the requirements of today and, say, 20–30 years ago.
Natalya Nikolaevna, a dentist with 30 years of experience, remembers this time well.
“When we first started working, there was one handpiece for 12-14 people per appointment, which was prescribed to be wiped with chloramine after each patient. Doctors worked without gloves. Now, for each patient, there are several individual tips, a sterile bag with instruments, a sterilizer for supplying water, and so on.”
, says the specialist.
Quartz lamps in offices have now, according to modern standards, been replaced by modern bactericidal devices that are harmless to people and constantly work in the presence of patients and doctors. “ There is no need, as before, to go out, quartz the room, and then be sure to ventilate it. Now devices designed for a specific area and located in each office purify the air throughout the day.”
, explains Natalya Nikolaevna.
Moreover, if you compare Russian and European infection safety standards, in Russia they are more stringent. The sterilization process includes several stages.
Stages of sterilization
After use, all instruments intended for manipulation in the oral cavity are brought to the sterilization room by assistants and soaked in a disinfectant solution for a certain time. This is the stage of preliminary disinfection, during which living pathogens of infectious diseases are destroyed.
There is a timer on the container with the disinfectant solution, according to which the drug is changed in a timely manner. Only after preliminary disinfection are the instruments washed under running water - thus, the infection does not enter the sewer.
“The types of disinfectant solutions used should be changed every 3 to 5 months so that microorganisms do not develop resistance to these disinfectants. We strictly observe this rule: we use several types of disinfectants, which we change at regular intervals,”
– says the head doctor of the clinic.
The second stage is pre-sterilization treatment in an ultrasonic bath with a disinfectant solution. As a result, protein and fatty contaminants, as well as medication residues, are cleansed. After processing, the instruments are washed and dried again. After this stage, they are already considered clean, so they are packaged in individual bags.
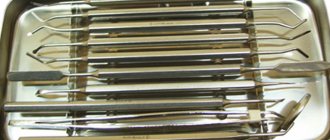
The third stage is sterilization in an autoclave. The packages with instruments have special indicators that change color after sterilization: pink stripes turn gray. Color change is possible only at a temperature of 134 degrees and an atmospheric pressure of two atmospheres. If the temperature or pressure is lower, the indicator will not change color.
After autoclaving, the instruments are placed on a quartz shelf where they are stored. The packed sterile package can be used for 10 days.
Sterilization of tips
For handpieces - elements of the dental unit into which the bur is directly inserted - a special sterilization process is provided. “We use a lot of different handpieces – ultrasonic, contra-angle, turbine. They cannot be soaked in a disinfectant solution, since modern high-tech tips are made of a certain alloy and have a complex structure. They are processed in a different way."
– explains Natalya Nikolaevna.
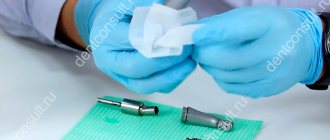
First, immediately after use, the plaque that remains after use is mechanically and chemically removed from them. For this purpose, special wipes soaked in a special disinfectant are used. After a 15-minute exposure in a napkin, the tips undergo pre-sterilization preparation: they are processed in a special “Quadrokey” apparatus, where they are purged with oil and a special disinfectant solution. Moreover, each tip goes through as many processing cycles as required.
“Quad key for tip processing is our own initiative
, - says Natalya Nikolaevna.
– According to SES standards, this stage is not required.
The tips can be cleaned with a tissue and then transferred to the autoclave. But since we have been working with special equipment from the German company KAVO for many years, our partners recommended that we purchase this device. It allows you to perform additional mechanical and chemical pre-sterilization treatment of the tip, guaranteed to remove from it all microparticles that could have entered during tooth preparation, while additionally treating the tip from the inside.” Although modern tips, according to the expert, are designed in a special way, preventing the leakage of blood and saliva in order to prevent the transmission of infection to the next patient. But in matters of infectious safety, it is better to play it safe, the chief doctor is sure.
After processing, the tips, either packaged or unopened, are sterilized in an autoclave or in a MELAG device specially designed for this purpose. It has a high-speed sterilization mode in 15 minutes, which is very important for doctors working at receptions.
Each of the stages of sterilization is very important, not a single one can be skipped. “ You can be completely sure that all the viruses have died only after the last stage of sterilization - autoclaving at a temperature of 134 degrees, a pressure of two atmospheres”
, notes the doctor.
Constant control
To control the quality of sterilization, in addition to indicators on the bags, special tests (intests) are provided, which are placed in autoclaves. Employees keep logs in which tests are posted, indicating the date and time of autoclaving.
Issues of infection safety in a dental clinic are supervised not only by medical workers of the medical institution itself, but also by specialists from regulatory authorities.
“Our network of clinics has an agreement with the SES. Specialists come to us regularly, take swabs - from tables, from instruments, air samples, take away packages of sterile instruments, check them for compliance with standards, and control the level of illumination. We regularly undergo such checks – and rightly so. Control is always needed"
, - the head doctor is sure.
When patients ask questions about sterilization, Natalya Nikolaevna and other doctors at the clinic explain and show everything in detail.
“Issues of infection safety in dentistry are priority, fundamental issues. After all, the quality of all work depends on the initial stages - how prepared and worked they are. We ourselves are treated here, our children are treated here. There are no special conditions for employees and their relatives: we take the same tips from the autoclave, the same tools."
, says the chief physician.
What is important for patients to know?
When visiting a dental clinic, you need to pay attention to the cleanliness of the office, the use of disposable consumables - gloves, napkins and a number of others. It is also important that the package with sterile dental instruments is opened directly in front of the patient.
“We also always show patients the packaging with the indicator color changed. Although we have a lot of regular customers who refuse to watch because they completely trust us.”
,” shares Dr. Zubareva.
She is convinced that patients have no risk of contracting any infections when visiting a dental clinic that complies with all modern standards.
Earlier, Elena Ikonnikova, a periodontist at the Zubareva Dental Clinic, spoke about symptoms, risk factors and modern approaches to the treatment of periodontitis.
Zubareva Dental Clinic:
st.
Ovrazhnaya, 10, (383) 349-97-97; st. Families Shamshin, 18, (383) 223-33-66; www.zub-nsk.ru
There are contraindications. Specialist consultation is required.
Stages of sterilization
Before proceeding directly to sterilization, it is necessary to carry out preliminary preparation. Tools and materials are washed, cleaned, dried - and only then sterilized. The processing steps for the toolkit are as follows:
- Disinfection. At this stage, the items to be disinfected are placed in a disinfectant solution. Exposure time depends on the solution and type of instrumentation.
- Washing. Tools and materials are removed from the solution, washed under running and then under distilled water. Some instruments can be cleaned mechanically using brushes. If the instrument has nicks or nicks, it is recommended to disinfect it and wash it in a special apparatus under ultrasound.
- Drying. The instrument is treated with steam and waited until it dries completely.
- Final sterilization. The stage depends on the method of processing the tools. Items are placed in a special package or container and then sterilized. There must be an indicator near them that will show that the required temperature or pressure has been achieved. After all stages, the instruments are stored under ultraviolet lamps or in individual packages so that they remain sterile.
Stages of sterilization of dental instruments
Very high demands are placed on the sterilization of instruments in dental clinics. To comply with them, it is necessary to properly prepare the tools for processing.
In this article we will talk about sterilization processing of instruments and materials.
The full cycle looks like this: disinfection → pre-sterilization cleaning → packaging → autoclaving → storage of sterile instruments.
Stage No. 1. Disinfection.
Disinfection is the first stage of preparing instruments.
There are two ways to process tools – mechanical (manual) and automatic (using specialized equipment).
Let's consider a mechanical method of disinfection of different types of instruments.
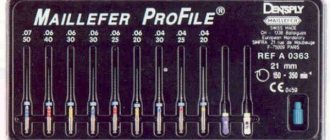
All dental instruments - burs, handpieces, etc. - are subject to disinfection. However, not all are subject to the same treatment.
All metal (for example, burs), plastic and glass instruments can be soaked in a disinfectant solution, but tips are strictly prohibited.
An alternative method of disinfection for handpieces is special wipes, such as Eco Jet. The wipes contain aggressive substances, so be sure to wear rubber gloves before use.
Important! Always follow the manufacturer's recommendations regarding dosage, solution concentration and exposure time for instruments. This will protect them from damage and premature wear.
Stage No. 2. Pre-sterilization cleaning.
At this stage, any contamination or residual disinfectant is removed from the products. The cleaning method depends on the texture of the products.
Tools with a smooth surface (for example, spatulas) can be cleaned with a special brush under running water.
And instruments with a ribbed or similar surface (for example, diamond burs) are cleaned only in equipment - an ultrasonic cleaner (bath). The fact is that the diameter of the bristles and threads on the surface of the tools, as a rule, do not match, and high-quality cleaning is impossible.
How does ultrasonic cleaning work? The device is a housing in which a container is placed. The tool is loaded into it, then the container is placed in the sink body. The cleaning agent is first poured into the device. Then the device turns on, the time is set - and the instruments are automatically cleaned of dirt.
After the cleaning cycle is completed, the instrument is removed from the sink, dried and packaged.
Important! Handpieces and similar instruments must not be cleaned in an ultrasonic cleaner!
Processing of collapsible tips. To easily and quickly clean the tips, choose dismountable models (for example, these are produced by W&H). They can be disassembled into elements and processed each separately.
As we said above, special wipes are used for disinfection.
Here are step-by-step instructions on how to process tools with them:
- Wear protective gloves;
- Disassemble the tip into its components;
- Wipe the surfaces of all elements with a napkin;
- Additionally, rinse the saline supply needles under running water using the needle that comes with the tip - this will thoroughly remove any remaining saline solution from the system.
Once the disinfection and cleaning cycle is complete, reassemble the tip completely and lubricate it.
Important! Be sure to lubricate the tips before packing.
Lubrication of tips. To lubricate the tool, use oil in a cylinder (it contains an attachment for mechanical tips) or in a special apparatus.
Be sure to remove excess oil from the tip. To do this, put it on the motor and turn it on for 30 seconds, wipe it with a napkin.
Stage No. 3. Package.
Manufacturers offer self-sealing bags and packaging devices.
The bags are available in different sizes and widths, so it won’t be difficult to choose one for the size of the tool. Packing products is very simple: place them in a bag, tear off the protective film with a sticky layer and seal the bag.
A packaging machine (for example, from Euronda) allows you to seal the bags yourself, adjusting their width and length. For this purpose, rolls of different winding widths are used (it is selected according to the size of the tools and trays).
Stages of making and sealing bags in a machine:
- Skip the required roll size to match the tool size;
- Pinch it - on the right side of the machine there is a lever that needs to be lowered down;
- Wait for a sound signal and color indication (orange) - this indicates that soldering has been completed;
- Cut the package (to do this, move the lever to the left, which is located on the right side of the device);
- Remove the bag from the machine.
Upon completion of the process, you receive a bag of the size you need, sealed on one side.
Now put the tool in it, wrap it, bring it to the heating element, fix it, press it and wait for the sound signal - and after a second the bag is hermetically sealed.
Self-sealing bags come in a standard length, while with a packaging machine you can adjust the length and width of the bags.
An important step in preparing for autoclaving! The packaging bags have 2 sides - one is transparent film, the other is paper. The paper used is special - with membranes. When you place a bag in an autoclave, the machine pumps the air out of the bag and steam passes through these membranes and sterilizes the items. During drying, these membranes are closed, and you receive a 100% sterile instrument, packaged in a sealed bag.
Therefore, it is important to place the instrument bags correctly on the tray before autoclaving: only with the paper facing up! This is the only way to guarantee high-quality sterilization and drying.
Stage No. 4. Autoclaving.
An autoclave is the most reliable way to sterilize instruments. It guarantees 100% sterility, and in terms of the quality of processing it simply has no equal.
Here are step-by-step instructions on how to sterilize instruments in an autoclave:
- Place trays of products on pallets in the machine;
- Select temperature mode and program;
- Confirm your choice - then the autoclave will perform the entire sterilization cycle automatically.
After the cycle is complete, remove the trays using the holder to avoid getting burned.
Possible mistakes when preparing for autoclaving:
Upon completion of sterilization in the machine, you will receive a completely sterile and dry instrument. But sometimes, after autoclaving, moisture remains in the bag. This should not be the case and means that at some stage you made a mistake.
This situation occurs for two reasons: incorrect placement of the instruments on the tray or incorrect packaging.
What to do to avoid this problem:
- always place bags on the tray with the paper facing up;
- make sure that the packages do not overlap each other, but are located freely on the tray;
- There should be a small distance between the bags for unhindered steam circulation.
After autoclaving, it is necessary to ensure proper storage of sterile instruments. Store it in packages in a dry and dust-free place.
Compliance with all stages of pre-sterilization preparation guarantees the safety of medical personnel and patients of the clinic, as well as the safety of instruments. You can buy the necessary equipment in the online store.
Features of working with different dental instruments
In dental practice, working with instruments involves distinctive features of sterilization. Instruments vary among dentists of different specializations.
- Endodontic instruments. Most endodontic instruments cannot be sterilized. They are disposable. After use, they must be disinfected and disposed of as biologically hazardous waste. Disinfection is necessary to ensure that pathogenic microorganisms cannot penetrate from the instruments to the surfaces with which they will come into contact. For example, they did not contaminate the soil when dumping hazardous waste. For each patient, they take their own individual disposable instrument. Packages are usually opened in the presence of the patient.
- Therapeutic dentistry. Instruments undergo all stages of sterilization. The only difference is the sterilization of dental handpieces. They cannot be soaked in a disinfectant solution. Therefore, the tips are manually washed with a solution, dried, lubricated, packaged and sent to an autoclave.
- General purpose kits. The disposable components of such kits are used personally for each patient, then disinfected and disposed of. But most tools are reusable. They are processed according to all stages of pre-sterilization treatment, and then placed in a dry heat or autoclave. Metal tools are usually heat treated. Objects with non-metallic parts - by pressure.
Sterilization of dental instruments
Sterilization and disinfection are important stages in the treatment of instruments and work surfaces, making any procedures safe for patients.
Disinfection is the destruction of pathogenic and opportunistic microorganisms - viruses, bacteria, fungi on tools and equipment to a level acceptable by sanitary and epidemiological standards.
Sterilization is the complete killing of microorganisms of all types, including spore forms, on surfaces and inside products.
To ensure all sanitary norms and rules, it is necessary to adhere to SanPiN 3.3686-21 “Sanitary and epidemiological requirements for the prevention of infectious diseases”, as well as SP 2.1.3678-20 “Sanitary and epidemiological requirements for the operation of premises, buildings, structures, equipment and transport, and also the conditions of activity of economic entities engaged in the sale of goods, performance of work or provision of services.”
The doctor must work accompanied by nursing staff who carry out processing of workplaces, disinfection, and also, in the absence of a centralized sterilization room, pre-sterilization cleaning and sterilization of medical devices.
Disinfection of the surfaces of objects located in the treatment area (instrument table, control buttons, keyboard, air gun, lamp, spittoon, headrest and armrests of the dental chair) is carried out after each patient. For these purposes, disinfectants that are approved for use in the presence of patients and have a wide spectrum of antimicrobial action are used.
All disposable instruments and consumables are collected and disposed of as Class B waste after each patient.
All reusable instruments and products that come into contact with the wound surface, mucous membrane, blood or injectable drugs are subject to sterilization.
Sterilization of instruments and other medical products necessarily includes the following steps:
- Disinfection
- Pre-sterilization cleaning
- Drying
- Sterilization
- Storage
Stage No. 1. Disinfection
Instruments must be carefully placed in a disinfectant solution. Before disinfection, all instruments or devices are opened, complex mechanisms are unscrewed and then immersed in a disinfectant solution. It is necessary to ensure that there are no air bubbles or voids left on the surfaces that would prevent the penetration of the product. When immersing locking instruments (tongs, nippers, scissors, etc.) in the disinfectant solution, you should make several working movements with them in the disinfectant solution.
The liquid should cover the instruments 1-2 cm above them for proper processing.
Disinfectants must have a broad spectrum of action against bacteria, viruses and fungi.
High-quality disinfectants must contain anti-corrosion additives so as not to damage the instruments.
Containers with ready-made or prepared solutions must have lids and stickers with the name of the disinfectant, concentration and date of preparation of the solution. When preparing a new disinfectant solution, the sticker on the container is filled with the relevant data.
It is necessary to monitor the correct preparation of the disinfectant solution and the preservation of its disinfectant properties until the end of the period of use, which is written on the label when preparing the solution, or until a precipitate forms. For this purpose, special indicators (test strips) are used, with which you can quickly and efficiently determine the suitability of the disinfectant solution for use. The indicator must be used immediately after preparing the disinfectant solution to ensure that the solution is prepared in the correct concentration, and also periodically monitor this solution to confirm that it has not lost its disinfectant properties. Each disinfectant has its own indicators; see the instructions for the disinfectant and indicators.
Please note that dental handpieces cannot be disinfected by immersion , only by wiping. We will talk about tip processing separately later.
Stage No. 2. Pre-sterilization cleaning (PSC)
After the disinfection holding time is completed, each product is washed in the same solution in which it was soaked, using a brush, a cotton-gauze swab or a fabric (gauze) napkin, after which it is rinsed with running water or cleaned in an ultrasonic cleaner. Not only dirt and small particles are washed away, but also the disinfectant itself, which damages the instruments with prolonged exposure.
Products with a ribbed surface (for example, diamond burs) and cavities must be cleaned in an ultrasonic cleaner, which cleans the smallest crevices on the instruments and their cavities.
After this, the instruments must be rinsed with distilled water to remove any remaining running water from them. If this is not done, then during sterilization, which is the next step, limescale deposits from the mineral residues of running water will be deposited on the instruments; over time, this will lead to a deterioration in the quality of the instruments, and will also interfere with high-quality disinfection and sterilization.
With a high-quality PSO, no biological tissue should remain on the instruments and the disinfectant solution should also be completely washed off. To assess the quality of PSO, an azopyram test is used; to carry it out, at least 1% of the instrument that has undergone a simultaneous cleaning procedure is taken, and if there are not many instruments, then at least 3 instruments of different types. If the azopyram test shows the presence of biological tissue residues or disinfectants, then all instruments are subject to repeated disinfection and PSO. If the azopyram test does not show the presence of biological tissue residues or disinfectants, then the instruments are allowed for further processing. It is also necessary to conduct a phenolphthalein test if this is indicated in the instructions for the disinfectant used.
Stage No. 3. Drying
After a high-quality PSO, instruments must be thoroughly dried before sterilization. To do this, they are laid out disassembled and opened on a clean, dry napkin and dried until visible moisture disappears, or special devices are used for this purpose that speed up drying, for example, a RELMA-BS-500 drying box or a drying cabinet.
Do not sterilize instruments that have not been dried!
After thorough drying, the instruments are sent for sterilization.
Processing of dental handpieces.
The process of manual processing of dental handpieces takes place in several stages:
- Rinse the tip channel with water (using mandrels or other devices) and then blow with air.
- Disconnect the handpiece from the dental unit, wipe the outer surfaces with a cloth moistened with water until visible dirt is removed.
- Treat the outer surfaces of the tip with special disinfectants approved for use for these purposes (taking into account the recommendations of the manufacturer of the tip).
- Disassemble the detachable parts of the tip and remove the tool (bur, cutter, disk, etc.).
- Lubricate the tip with special lubricants intended for these purposes. Remove any remaining grease by wiping with a clean cloth.
All washing, purging and lubrication operations can be carried out manually, but it is preferable to use cleaning and lubrication devices, because they involve more thorough processing of the tips. Before loading into such devices, the tips must also be wiped with a clean damp cloth to remove visible dirt and treated with a cloth moistened with a special disinfectant.
Next, the tips are sent for sterilization.
Stage No. 4. Sterilization
After completing all the previous steps, dental instruments (including handpieces) are ready for sterilization.
Sterilization can be carried out in packaged form, with instruments placed in individual disposable or reusable packaging.
Sterilization can also take place unpackaged, and the instruments must be immediately used for their intended purpose, or can be stored in a UV chamber for the period specified in the instructions for the UV chamber.
To sterilize dental instruments, it is recommended to use a steam sterilizer - an autoclave and an infrared sterilizer (IR sterilizer).
Sterilization in an autoclave occurs due to exposure to steam and high temperature (from 121 to 134 ° C, at a pressure of 1.1-2.1 kgf/cm2). The full sterilization cycle (heating-preliminary air removal-sterilization-drying) takes about 25-50 minutes (depending on the selected sterilization mode). The autoclave uses distilled water to operate.
In an autoclave, products made from corrosion-resistant metals, glass, textile products (132-134°C), and at a temperature of 120°C, products made from rubber, latex, and certain types of plastics are sterilized.
It should be understood that saturated steam under high pressure is a fairly aggressive chemical agent that has a corrosive effect on metals. The instructions for some dental instruments even specifically indicate that it is not recommended to autoclave them, although these instruments are made of stainless steel. The same applies to instruments that have cutting edges (there are especially many of them in orthodontics); they quickly become dull when sterilized in an autoclave. Therefore, to sterilize such instruments, it is recommended to use an infrared sterilizer, which sterilizes in the most gentle way due to short-term heat exposure and the absence of aggressive chemical agents.
IR sterilizers use an environmentally friendly thermal agent - radiant energy in the optical range (powerful visible and infrared pulses). With this method of transferring thermal energy, heating of the sterilized products occurs quickly and efficiently. Sterilization lasts from 4 to 10 minutes. Products made of metals and glass are sterilized.
Read more about the IR sterilizer in our next article.
To control sterilization modes, it is imperative to use chemical indicators during each sterilization cycle, which are laid out inside the sterilizer chamber and placed inside each package (if sterilized in packaged form).
Stage No. 5. Storage
If the instruments were sterilized in packaged form (Kraft bags, containers, etc.), then they remain sterile for the period specified in the packaging instructions, subject to the necessary storage conditions (the storage place must be clean and dry, without conditions that may lead to condensation).
If instruments were sterilized unpackaged, they must either be used immediately for their intended purpose (within 1 hour after removal from the sterilizer) or stored in a special ultraviolet chamber (UV chamber) for the time specified in the instructions for the UV chamber.
Please note that instruments cannot be stored in the UV chamber in packages that have a transparent film, because... this film is destroyed when exposed to UV radiation.