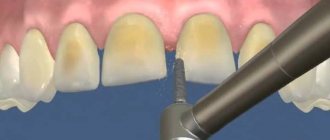
Tooth preparation is a dental procedure that involves removing (grinding) surface dental tissues and giving the dental crown a shape that would allow it to be easily covered with a prosthesis.
Until recently, teeth grinding was considered one of the most unpleasant and painful dental procedures. In modern medical practice, dissection is performed under local anesthesia using high-tech equipment to minimize discomfort from the procedure.
What is tooth preparation
Preparation (turning) is one of the stages in orthopedic treatment, which involves grinding down hard tissues to level their surface.
Previously, this procedure was extremely painful and quite lengthy. Modern instruments and advanced local anesthetics have significantly reduced the time of manipulation and made them absolutely painless.
Is it possible to do without turning?
Many patients are concerned about the question: is it possible to do without the preparation process and install a crown or prosthesis on a tooth in an intact state? Unfortunately, despite all the advances in dentistry, it is impossible to skip this stage of treatment.
In order for the crown to be securely fixed on the tooth, they must fit together as accurately as possible. But the natural tooth shape is not ideal; the side walls of the teeth have a convex shape, which excludes the possibility of creating a crown. During the grinding process, part of the enamel is ground down, as a result of which the tooth receives the correct geometric shape, onto which an orthodontic structure can easily be placed. In addition, any crown has its own thickness, which must be taken into account so that it does not interfere with the oral cavity and does not cause discomfort when talking and eating.
During preparation, the dentist removes all tissues affected by caries from the surface of the teeth. This is necessary so that complications do not develop after prosthetics - secondary caries and destruction of the supporting tooth.
How to grind correctly
If pulpless (“dead”) teeth are being prepared, there is no need for anesthesia, except in cases where the use of a special thread is required to move the gums back. If the grinding procedure is carried out on vital (“living”) teeth, then in order not to hurt the patient, anesthesia is required.
When preparing, it is imperative to take into account the anatomical features of various teeth and possible reactions of soft tissues. It is advisable to conduct an X-ray examination of the patient before the procedure in order to have an idea of the structure and places where the opening of the dental cavity is most likely.
If your teeth and gums hurt after grinding: reasons and what to do
The turning procedure itself does not cause any pain when adequate anesthesia is used. But after the effect of the painkiller wears off, unpleasant and even painful sensations may occur both in the tooth itself and in the surrounding gum.
Possible reasons:
- If the preparation is performed on a vital tooth, then it is possible that too thin a layer of dense tissue is left above the pulp containing nerves and blood vessels and the ground tooth thus reacts not only to the intake of sour or cold food, but also to touch. In such cases, installation of a temporary crown or additional cementation of the thinned area is indicated.
- To carry out shoulder grinding, the doctor needs a good overview of the working area, especially if the manipulations are carried out deeper than the gingival margin. To do this, gum retention is carried out - moving its edge back using a special thread. This manipulation can cause compression of the soft tissues, swelling and pain. Normally, such sensations go away on their own within 1-2 days.
- If enough time has passed after grinding, then the occurrence of pain in the tooth may indicate the development of pulpitis or periodontitis. This symptom is dangerous and requires urgent attention to a specialist.
In what cases is restoration by installing a crown on a tooth indicated?
The procedure for installing a crown on a tooth has its own indications, including:
- Destruction of the crown part of the tooth by the carious process by more than 50%;
- Traumatic damage to a dental unit, in which its roots remain viable and are not damaged;
- Aesthetic defects that cannot be eliminated using other technologies: noticeable chips in the enamel, discoloration of the enamel coating, cracks.
A dentist may recommend installing temporary crowns for a patient with periodontitis: the procedure will help prevent further tooth loosening and prevent future tooth loss.
Restoration with crowns is contraindicated:
- For some blood pathologies;
- If you are allergic to local anesthetics;
- In the presence of chronic diseases of the body in the acute stage;
- In the presence of mental disorders.
Contraindications to the installation of crowns are identified during preparation for the prosthetic procedure and diagnostic studies.
Preparation methods: ultrasonic, laser, tunnel, chemical
There are several methods that allow you to prepare teeth; let’s look at each of them in more detail.
Ultrasonic preparation
The principle of operation of devices of this type is that the grinding of teeth occurs due to high-frequency vibration of the instruments under the influence of ultrasound.
Advantages:
- working tips exert minimal pressure on tooth tissue;
- during operation, a small amount of heat is released and no significant heating of enamel and dentin occurs;
- the procedure is painless;
- Ultrasound does not cause microcracks and chips on the walls of the pin;
- there is no negative effect on pulp tissue.
Laser preparation
Pulsed lasers are used for grinding teeth, the effect of which is that under the laser beam, water in the dental tissues is greatly heated. This leads to microscopic damage to the integrity of the enamel or dentin, pieces of which are immediately cooled and removed using a special water-air mixture.
Advantages:
- Laser equipment operates silently.
- High safety of the procedure, since there are no elements rotating at high speed.
- Low heating of dental tissues.
- Turning speed.
- Complete absence of pain.
- The edges of the pin have no chips or cracks.
- Since the procedure is non-contact, the possibility of infection is minimized.
»
Tunnel preparation
Today, turbine dental units are used for grinding teeth, with the ability to adjust the operating speed, and diamond or metal tips. The result of the work directly depends on the quality of the equipment, since worn-out tools cause significant overheating of the tissue, which significantly increases the risk of destruction.
When grinding teeth using the tunnel method, they try to leave as much of their own dental tissue as possible. The main advantage of the technique is the ability to clearly control the size of the removed tissue layer and clearly predict the result.
Flaws:
- possible heating of the enamel and resulting pain with insufficient anesthesia;
- If the technique is violated, soft tissue injury may occur;
- When using low-quality instruments, there is a high risk of microchips and cracks in hard dental tissues.
Air abrasive preparation
When using this method, instead of a rotating drill and drill, an air mixture with abrasive powder is used, which is supplied under fairly high pressure. When contacted with enamel or dentin, this combination causes minor destruction and removal of tooth dust.
Advantages of the technique:
- simplicity and high speed of all manipulations;
- no heating of tissues and no pain;
- the absence of vibration has a positive effect on pulp tissue during the preparation of vital teeth;
- maintaining the maximum amount of dental volume.
Chemical preparation
The chemical treatment method involves the use of active substances (most often acids) that soften enamel and dentin, followed by removal of damaged tissue. The disadvantage of the procedure is the need for prolonged exposure to reagents (sometimes up to half an hour).
Advantages of the chemical method:
- no thermal damage to teeth;
- there is no need for pain relief;
- there are no small chips or microcracks in the enamel;
- psychological comfort for the patient due to the lack of sound of a working drill.
Restoring defects in teeth and dentition with the help of non-removable orthopedic structures is today a widespread and in demand treatment method.
The development of dental materials science, the emergence of new structural materials and modern methods of precision manufacturing of fixed denture frames force the doctor to pay increasing attention to detail. Properly carried out preparation of the supporting teeth, accurately taken impressions - the effectiveness and durability of the future restoration depends on these routine, but no less important procedures. One of the most important points in this case is the creation of a strong and durable connection between the restoration and the hard tissues of the tooth, i.e. ensuring good retention of the future structure. Retention is understood as the ability to resist displacement of the restoration along the trajectory of its installation [6].
The retention of fixed orthopedic structures is influenced by many factors, the most important of which are:
— stump geometry,
including such parameters as the taper of the stump, the ratio of the axial and lateral dimensions of the stump, the presence of auxiliary retention elements (pins, grooves, etc.);
— the nature of the contacting surfaces,
namely: exact correspondence of the restoration to the tooth stump, microrelief of the surface of the stump and restoration;
— link parameters:
type and properties of material for fixing the restoration; total area of cement film, etc.
In this article, we would like to dwell on the influence of the microrelief of the prepared surface on the quality of the subsequent restoration.
What effect does the surface relief of the stump have on the retention of an artificial crown? There is no clear answer to this question in the available scientific literature. Of great importance here is the type of fixing cement and its ability to form a strong bond with the hard tissues of the tooth.
Before continuing to consider this issue, it seems necessary to clarify the terminology used, namely the term adhesion
and its derivatives.
The ambiguity and uncertainty of the term adhesion,
found in scientific publications, is a consequence of the lack of an accurate definition of this concept in the scientific community. The lack of lexical agreement often makes it difficult to understand the essence of a given phenomenon and, as a result, leads to a false idea of the properties of materials.
The clearest, from our point of view, is the definition of adhesion as the phenomenon of “the occurrence of intermolecular interaction between dissimilar condensed phases brought into contact” [2]. This definition implies that a mandatory condition for an adhesive connection is the formation of intermolecular bonds between two contacting surfaces. Thus, fixing cements, the principle of interaction of which with the surface of enamel and dentin is based only on mechanical adhesion due to uneven terrain, should be classified as non-adhesive.
A wide range of different materials are available for the cementation of cast restorations. Zinc phosphate cement has been used for these purposes for a long time. It is known that this cement does not adhere to enamel and dentin, i.e. The connection between the tooth and the restoration using zinc phosphate cement is carried out due to the presence of irregularities (roughness) on the opposing surfaces. A special feature of this material is its ability to effectively wet the surface due to its low surface tension. This is explained by weak cohesive forces between molecules in freshly mixed cement, which results in reduced viscosity and correspondingly high fluidity [23]. This feature allows the unset cement to flow into all surface irregularities, thus forming a strong mechanical connection with the tooth structures.
From the above it follows that the rough surface of the tooth stump will contribute to the retention of cast restorations fixed with zinc phosphate cement. This assumption was confirmed by the work of G. Oilo and K. Jorgensen [24], which demonstrated that the retention of cast metal restorations was 2 times higher in the presence of a surface with grooves 40 µm deep than surfaces with grooves 10 µm deep.
Similar results were obtained by D. Felton et al. [15], who showed that the retention of cast crowns increased by more than 30% in the case of processing the tooth core with a diamond tool compared to processing with a finishing carbide bur. The direct dependence of the retention of cast restorations on the surface roughness of the stump when using zinc phosphate cement is also indicated by N. Juntavee and L. Millstein [20].
A detailed study on this topic was carried out by M. Ayad et al., who studied the retention force of three types of cements on the tooth surface treated with different types of instruments. The authors showed that when fixed with zinc phosphate cement, artificial crowns had better retention if the tooth stump was treated with a carbide toothed bur. The results were somewhat worse after treating teeth with a diamond tool, and the least retention was demonstrated by stumps polished with a finishing carbide bur [9].
N. Krunich [1], comparing the treatment of the axial walls of the stump with diamond burs with black (diamond particle size 150-180 µm) and red markings (particle size 20-42 µm), showed that with increasing surface roughness, the retention of cast crowns fixed increases for zinc phosphate cement. In another study, B. Smith [31] also found differences in the retention of metal restorations cemented with zinc phosphate cement on teeth whose surface roughness varied from 6 to 118 μm (0.15 to 3 μm). Moreover, in this study, the degree of retention also increased as the roughness of the stump increased, but the results were not statistically significant. It should be noted that the roughness values studied by the author were too small to have any clinically significant effect on the retention of the artificial crown.
The results of the above works demonstrate the significant influence of the stump surface topography on the retention of restorations when using non-adhesive
cement.
The nature of the connection with the tooth surface is fundamentally different for adhesive
cements, which include most of the materials for fixation presented on the dental market today. The properties of polycarboxylate and glass ionomer cements are based on the principle of forming a chemical bond with hard dental tissues. Composite cements can be classified into a special group based on the nature of interaction with hard dental tissues. The mechanism of their adhesion to enamel and dentin cannot be unambiguously characterized only as a chemical or physical interaction, although undoubtedly this class of materials should be classified as adhesive.
To take advantage of the benefits of adhesive cements and ensure good retention, maximum contact of the luting material with the prepared surface is of great importance [28, 29]. Excessive roughness of the relief can weaken the fixation of the restoration due to the formation of air bubbles or the accumulation of dentin filings in the surface irregularities, which will make it difficult for the cement to wet the dentin and will prevent the formation of van der Waals bonds and then chemical bonds.
In their work, M. Negm et al. [22] showed that in the case of fixing artificial crowns with polycarboxylate cement, the rough surface, although it reduced the tensile strength of the connection between the crown and the tooth stump, nevertheless increased its shear strength [22]. The work of D. Witwer [36] demonstrated that polycarboxylate cement provided better retention of restorations when the tooth surface was rougher. In another study by A. Tjan et al. [32] showed that smoothing the surface of the core during cementation with glass ionomer cement does not have a significant effect on the retention of cast restorations. M. Ayad et al. came to the same conclusion. [9], studying the adhesion of glass ionomer and composite cements to the surface of dentin prepared with various types of burs. The authors showed that although the retention of restorations cemented with glass ionomer cement was increased when using diamond and carbide toothed burs compared with planing the core surface, these results were not statistically significant. As for the adhesion of composite cement, in this case the type of preparation tool had virtually no effect on the degree of retention.
The above studies demonstrate the influence of the nature of the surface of the axial walls of the stump on the retention of fixed orthopedic structures. The quality of surface treatment of the ledge has a completely different meaning. Perhaps the most important aspect in this case is the excessive surface roughness in the shoulder area, which leads to an insufficiently tight marginal fit of the restoration [12]. The irregularities created during preparation in the shoulder area cannot be reproduced at the edge of the frame; therefore, to create a restoration with good marginal fit, a smooth and clear preparation margin is necessary [6].
To summarize the above, it should be noted that the microrelief or roughness of the surface of the stump is an important factor on which retention, as well as the accuracy of the fit of the artificial crown to the tooth tissues, depends.
In turn, the roughness of the stump depends on many factors, such as the speed of preparation, the pressure exerted on the instrument during preparation, the presence and effectiveness of water-air cooling, etc. [4, 33]. But the main factor determining the nature of the prepared surface is, of course, the type of preparation tool [7, 8].
All rotating instruments for preparing teeth for fixed orthopedic structures can be divided into two categories: abrasive and cutting. The most effective and frequently used abrasive material for excision of hard dental tissues is a diamond particle. Therefore, abrasive tools primarily include tools with a diamond-coated working part. It should be noted that such a generally accepted term as “diamond bur” is not entirely correct, since the working part of this tool is not made of diamond. Diamond particles only cover the surface of the steel tool blank. However, it makes sense to use this short and familiar term to refer to abrasive tools with a diamond-coated working part.
Abrasive tools remove hard tooth tissues by grinding; the substrate is removed by a large number of randomly arranged diamond grains, each of which removes a small fragment of hard tooth tissues, forming tiny depressions.
Cutting tools primarily include tungsten carbide (carbide) burs. A bur is a metal rod with sharp edges that perform a cutting function. Each face of such a tool cuts off a layer of material of a certain thickness from the surface, depending on the sharpening angle of the blades, pressure on the tool, resistance of the substrate, etc. [3, 5].
It is believed that for processing the hardest tooth tissue - enamel, it is advisable to use diamond tools, and carbide burs are optimal for precise preparation of softer dentin and creating boundaries, i.e. To effectively use the advantages of both types of instruments, diamond burs are recommended for excision of large volumes of tissue, and carbide burs are recommended for the final stages of preparation. Moreover, this sequence of using tools works best when using burs of the same shape and size [6].
Some time ago, an original series of carbide burs called Great White Ultra was released. These instruments are recommended by the manufacturer for the preparation of teeth for artificial crowns and combine an aggressive design of the lateral edges with transverse notches for fast and effective removal of enamel and dentin and a non-notched bur tip to create a smooth preparation margin. In this regard, it seems interesting to conduct a comparative analysis of the quality of tooth preparation using a new carbide bur and a traditional diamond tool.
The purpose of this study was to assess the nature of the surface obtained during the preparation of teeth for fixed orthopedic structures using diamond and carbide rotary instruments.
Material and methods
For a comparative evaluation of two different types of burs, a carbide bur GWU No. 856-018 (SS White Burs, Inc.) was selected as a tool with a cutting working surface. The abrasive tool used was a diamond bur FGCR No. 856-018 (SS White Burs, Inc.) with a green marking ring on the shank. This bur fully corresponds in geometric shape and size to the GWU bur No. 856-018 and is also intended for the rapid removal of large volumes of hard tooth tissue during the process of odontopreparation (Fig. 1, 2).
Figure 1. Boron GWU 856-018.
Figure 2. Boron FGCR 856-018.
The study material consisted of 20 intact human premolars of the upper jaw, removed for periodontal reasons in patients of both sexes aged 35 to 55 years. Teeth were selected for the experiment no later than 20 minutes after their removal from the oral cavity. Immediately after extraction, the teeth were subjected to thorough mechanical cleaning and disinfection and placed in a 0.09% sodium chloride solution, in which they were stored at room temperature until the experiment, but not more than 2 weeks.
All samples were divided into two groups of 10 teeth each. The teeth of group 1 were sequentially prepared with the same carbide bur GWU 856-018; The preparation of teeth of the 2nd group was carried out sequentially with the same diamond bur FGCR 856-018.
In all cases, preparation was carried out at a bur rotation speed of 300,000 rpm using a TREND TC–95 RM turbine handpiece (W&H, Austria) with a single aperture for supplying a water-air flow. The intensity level of water-air cooling during the preparation of all tooth samples was determined by a water flow rate of 40±2 ml/min.
All tooth samples were prepared for a cast crown with a circular semicircular shoulder.
Electron microscopy of prepared tooth surfaces was performed on a JEOL JSM-840A scanning electron microscope with a standard resolution of 4 nm at an accelerating voltage of 10 kV and magnification from 40 to 1000.
Before electron microscopic examination, all samples of prepared teeth were fixed on object tables using conductive adhesive Watford (England). Then they were placed in a vacuum chamber of a JEOL FINE COAT Ion Sputter JFC 1100 apparatus at a current of 5 mA for 15 min to deposit a thin conductive film of gold on the surface of the samples (Fig. 3, 4).
Figure 3. JEOL FINE COAT Ion Sputter JFC 1100 with a sample stage in a vacuum chamber.
Figure 4. The process of applying a metal film to samples in a vacuum chamber.
Electron microscopy of the working parts of diamond and carbide burs was carried out on a JEOL JSM-840A scanning electron microscope with a standard resolution of 4 nm at an accelerating voltage of 10-40 kV.
After the burs were placed on the stage and fixed in the chosen position using conductive adhesive from Watford (England), they were placed in the microscope chamber. Studies were carried out at magnifications from 30 to 1000.
results
Part 1. Preparation with diamond instruments
1.1. Study of the relief of axial walls
Studying the dentin surface profile at 70 magnification shows that the microrelief of the axial walls of the stump prepared with a new diamond tool is represented by many alternating grooves and ridges running perpendicular to the longitudinal axis of the tooth and parallel to the direction of movement of the tool during preparation (Fig. 5).
Figure 5. Profile of a surface prepared with a diamond tool FGCR 856-018. Profile irregularities at various levels are clearly visible. ×70. A detailed study of the surface allowed us to conditionally identify several levels in the relief elements depending on their size, so the deepest grooves are classified as the first level. The depth of these grooves, i.e. the shortest maximum distance (perpendicular) from the tangent to the tops of the ridges to the deepest point of the groove is on average 40 µm. It is also possible to distinguish smaller grooves of the second level, the depth of which, as a rule, is about half the depth of the grooves of the first level and is approximately 20-25 µm. The width of the grooves of the first and second levels varies within a fairly wide range - from 50 to 85 μm.
This character of the relief of the stump walls prepared with diamond burs is due to the characteristics of abrasive tools associated with their manufacturing technology.
It is known that the diamond particles covering the surface of diamond burs vary significantly in size even within the same tool. In this case, diamond grains, as a rule, have an irregular shape. Thus, using scanning electron microscopy, we found that the maximum sizes of diamond grains of the FGCR 856-018 tool (“SS White Burs, Inc.”) with green markings on the shank (Coarse) lie in the range from 140 to 190 μm with an average size particles 170 microns. In addition, in the process of applying them to the surface of a steel tool blank using electroplating, individual grains are immersed in the metal binder to varying degrees. All this leads to the fact that diamond particles protrude above the surface of the tool to different heights (Fig. 6).
Figure 6. Electron diffraction pattern of the new diamond tool FGCR 856-018. Diamond particles are located at different levels above the surface of the metal base.
The formation of first-level grooves is caused by the passage of the most protruding diamond particles along the dentin surface. Less deep grooves of the second level with a depth of 20-25 microns are probably formed due to the work of grains protruding from the binder to a smaller height. Both grains are cutting, and they are responsible for the formation of the characteristic surface topography. So, in Fig. 6 it can be seen that some diamond grains can protrude above the surface of the metal bond to a height of up to 120 microns, others will stand out from the bond a little less (119 microns - 21 microns = 98 microns). This difference in values fully corresponds to the difference in values between the grooves of the first and second levels (40 µm – 20 µm = 20 µm).
Most of the diamond grains protrude from the bond to a much smaller height, and, therefore, do not participate in the formation of the surface topography. This conclusion is confirmed by the fact that the distance between them and the most protruding grains exceeds the maximum size of the relief irregularities (119 µm – 54 µm = 65 µm; 65 µm >40 µm).
As can be seen from the graphical analysis of Fig. 5 and 6, the dimensional characteristics of the tooth surface relief elements do not correspond to those on the surface of a diamond bur. Therefore, it can be assumed that the complete immersion of all grains to the base in the substrate, i.e. does not occur in the dentin of the tooth. Apparently, this is due to both some resistance of the substrate and the filling of the cutting relief of the instrument with organic and inorganic dentin components, which prevents further immersion of the boron into the substrate and reduces its effectiveness.
When studying the microrelief of the axial walls of the stump at a magnification of 250 (Fig. 7)
Figure 7. Dentin surface profile after preparation with the FGCR 856-018 diamond instrument. At the bottom of the main groove, smaller grooves are clearly visible. ×250. Small grooves are clearly visible running along the bottom of the main grooves, which can conditionally be classified as elements of the third level. Their depth does not exceed 10-12 microns, which is several times less than the depth of the furrows of the first and second levels. The width of these grooves lies in the range of 15-25 µm.
The third-level grooves appear to be a consequence of the complex configuration of the diamond particle itself. The surface of each diamond particle has irregularities. There are microprotrusions, the relief of which is heterogeneous and contains so-called submicroprotrusions (Fig. 8).
Figure 8. Electron diffraction pattern of the surface of the new diamond tool FGCR 856-018. A single diamond grain with a complex configuration is visible in the field of view. ×450. They play the role of independent abrasive elements, removing a significantly smaller amount of dentin compared to the main abrasive element (i.e. the grain itself).
In Fig. 9, a
Figure 9. Electron diffraction pattern of the dentin surface after preparation with a new diamond instrument FGCR 856-018. a - ×200. shows a general view of the dentin surface prepared with a diamond bur. At a magnification of 200, it is clear that the preparation surface is contaminated with fragments of hard tooth tissue. They are located randomly on the dentin surface and have sizes from 3.5 to 8.5 microns. Larger fragments are also found, reaching sizes of 30 microns.
Study of dentin at a magnification of 1000 (Fig. 9, b)
Figure 9. Electron diffraction pattern of the dentin surface after preparation with a new diamond instrument FGCR 856-018. b - ×1000. showed that the surface is covered with the so-called smear layer, which is formed as a result of preparation using rotating instruments and is a layer of fine dentinal filings, plastically deformed and smeared over the prepared surface [18]. It can be seen that the smear layer covers the entire surface of the dentin, completely covering the openings of the dentinal tubules. This indicates a fairly large thickness of the smear layer, significantly exceeding the diameter of the lumen of the dentinal tubules. Our electron microscopic study of transverse chips of dentinal fragments showed that the diameter of the lumen of dentinal tubules in the coronal part of the tooth varies on average from 1 to 2 μm. These values are fully consistent with the data of other researchers [17, 26].
The formation of a smear layer when preparing teeth with diamond tools is associated with the peculiarities of the abrasive processing mechanism, which has a significant impact on the nature of the resulting surface.
The ground surface is formed due to the simultaneous action of both geometric factors characteristic of the cutting process and plastic deformations accompanying this process. From a geometric point of view, roughness is formed as a result of copying the trajectories of individual abrasive grains on the machined surface. The plastic deformation that occurs in this case greatly distorts the microrelief of the surface obtained as a result of the action of geometric factors. Therefore, a polished surface cannot represent only a mass of parallel scratches as an exact reproduction or trace of the movement of abrasive grains.
There are significant differences in the nature of the interaction of individual abrasive grains with the treated surface. As noted above, the grains protrude above the surface of the ligament to different heights, therefore, during the preparation process, only the most protruding grains, which are the cutting ones, are removed from the substrate. Other grains, located deeper, cut into the surface being processed to such an insignificant depth that only plastic “extrusion” and deformation of the substrate occurs without removing the chips. And finally, most of the grains protrude from the bond to such a height that they are not able to come into contact with the surface being processed and are non-cutting (see Fig. 6).
Consequently, in the actual process of abrasive processing, most of the grains do not cut, but somehow plastically deform the surface layer of dentin. When cutting into the substrate, the edge of the grain first compresses it, and if this force exceeds the resistance of dentin, chips are separated. In other words, the process of chip formation is accompanied by plastic deformation of the surface of the substrate, as a result of which a change in the shape and properties of the surface layer occurs.
As a result of heating, high pressure on the tool during preparation and the resulting plastic deformations, the so-called smearing of the material over the treated surface is observed. These phenomena change the surface relief of dentin compared to the relief formed by purely geometric factors.
1.2. Study of the ledge surface
In Fig. 10
Figure 10. Electron diffraction pattern of the shoulder surface using the FGCR 856-018 diamond tool. ×40. shows a general view of the shoulder in the area of the preparation border after processing with a diamond tool (magnification 40). The electron diffraction pattern shows that the rounded shape of the shoulder clearly corresponds to the shape of the tool tip (see Fig. 6). This trough-shaped shoulder configuration is considered optimal for most cast restorations [6]. The relief of the surface of the ledge, as well as the relief of the axial walls, is represented by parallel running alternating grooves and ridges, between which the same elements of a smaller order are located. The distance between the edges of the grooves in the area of transition of the axial wall of the stump into the surface of the ledge is somewhat widened, which looks like traces of “sliding” of abrasive grains along the surface of the tooth. This is probably due to the fact that the direction of movement of the rotating tool when preparing the shoulder had both a horizontal and a vertical component.
Deep cracks on the dentin surface are not associated with the preparation process, but are a consequence of internal stresses that arose during the mandatory drying of tooth samples before applying a conductive gold film to their surface. This conclusion can be made based on the fact that the number of such cracks is small, and their edges clearly coincide with each other. This means that they formed after the preparation was completed.
Thus, in the process of preparing hard tooth tissues with diamond tools, a characteristic surface microrelief is formed with a large number of irregularities of various levels, including in the area of the ledge, covered with a relatively thick smeared layer.
Part 2. Preparation with carbide instruments
2.1. Study of the relief of axial walls
In Fig. eleven
Figure 11. Electron diffraction pattern of the dentin surface after preparation with a new carbide bur GWU 856-018. ×50. It can be seen that as a result of dentin preparation with a GWU carbide bur, a specific wave-like surface with a regular structure of irregularities, representing many repeating ridges, is formed. The ridges are located at approximately equal distances from each other, perpendicular to the longitudinal axis of the tooth and parallel to the direction of movement of the instrument during preparation. It is also clear that on the prepared surface there are loose fragments of hard dental tissues that have no connection with the underlying dentin. They are located randomly and have sizes from 15 to 25 microns. Larger fragments are also found, reaching sizes up to 80 microns.
Study of the profile of the prepared surface at a magnification of 70 (Fig. 12)
Figure 12. Profile of a surface prepared with the new GWU 856-018 bur. Parallel dentinal ridges are visible. ×70. clearly shows the presence of parallel ridges on the dentin surface. It can be seen that the surface of the dentin between the ridges is even and smooth, and the ridges themselves have a jagged shape with a flattened top. Analyzing the dimensions of the main relief elements, it should be noted that the distance between the tops of adjacent ridges in the middle third of the axial wall of the stump is 325 µm. In this case, the distance between the bases of adjacent ridges is 260 µm (see Fig. 12). Thus, the width of the ridges does not exceed 65 µm (325 µm – 260 µm = 65 µm), and their height is on average 30 µm.
From the above data it follows that the resulting relief is not just a negative reflection of the geometry of the cutting bur blades (Fig. 13),
Figure 13. Electron diffraction pattern of the surface of the new GWU 856-018 bur. Noteworthy are the spirally arranged blades of the tool with transverse notches. ×30. but has a complex formation mechanism. The specific surface character is a consequence of the original design of the Great White Ultra series instruments. The GWU 856-018 bur has six cutting blades, located not strictly parallel to the longitudinal axis of the tool, but at an angle to it, in a spiral. This ensures smoother operation of the bur without beating during the preparation process. Each blade has many transverse serrations dividing its working edge into a large number of teeth. It should be noted that the notches on the blades of the tool are not made strictly perpendicular to its longitudinal axis, but at a certain angle. This feature determines the fact that when the tool rotates, the cutting area of each tooth partially overlaps the cutting area of a similar tooth of the adjacent cutting blade. In other words, the smooth dentin surface between the ridges is formed as a result of the sequential passage of several teeth of adjacent blades with overlapping cutting areas along it, and the formation of the dentin ridge occurs only after a certain number of revolutions of the tool. This mechanism explains such a rare arrangement of the ridges and such a significant distance between them compared to the width of the tool teeth (see Fig. 13).
When studying the microrelief of the axial walls of the stump at a magnification of 200 (Fig. 14, a)
Figure 14. Electron diffraction pattern of the dentin surface after preparation with a new carbide bur GWU 856-018. a — ×200; despite the presence of a smear layer on the surface of the dentin, gaps in the dentinal tubules are visible. the beginning of the ridge is clearly visible in the field of view. It has a flattened top and a trapezoidal cross-section. On the dentin surface between the ridges, slight transverse irregularities of a lower order are visible, the formation of which is apparently associated with the passage of individual bur teeth along it. Already at this magnification it is clear that the surface of the prepared dentin is dotted with many small depressions, which are nothing more than the gaps of the dentinal tubules.
When examining the same area at a magnification of 1000 (Fig. 14, b)
Figure 14. Electron diffraction pattern of the dentin surface after preparation with a new carbide bur GWU 856-018. b — ×1000; despite the presence of a smear layer on the surface of the dentin, gaps in the dentinal tubules are visible. it can be seen that the surface of the dentin is covered with a so-called smear layer, as in the case of preparation with a diamond instrument (see section 1.1).
It can be seen that the smear layer is quite dense, homogeneous and covers the entire surface of the dentin. However, it does not cause complete closure of the lumens of the dentinal tubules. In addition, one can observe the so-called effect of partial “falling through” of the smear layer into the lumen of the dentinal tubules. This phenomenon indicates a small thickness of the smear layer, comparable to the diameter of the lumen of the dentinal tubules, i.e. its thickness probably does not exceed 1-2 µm.
When preparing the dentin surface with a carbide bur, the formation of a smear layer is inevitable, since plastic deformation of the surface layer occurs. However, these plastic deformations are much less pronounced than in the case of abrasive surface treatment, which is due to differences in the design of cutting and abrasive tools (see section 1.1). The degree of plastic deformation of surface dentin, and hence the thickness of the smear layer, depends on many factors, such as the value of the main rake angle of the instrument (the value of this angle determines the cutting efficiency of the bur), processing speed, pressure on the instrument during preparation, the use of water-air cooling and tool wear.
Thin longitudinal scratches are also visible on the surface of the dentin, which are probably the result of the impact of microroughness on the cutting edges of the instrument. These irregularities may be caused by metallurgical defects that occur during the process of turning the characteristic tool design from a solid tungsten carbide blank (Fig. 15).
Figure 15. Electron diffraction pattern of the side face of the new GWU 856-018 tool. The characteristic structure of the tungsten carbide alloy is visible in the area of the cutting edge of the bur blade. ×1000.
2.2. Study of the ledge surface
In Fig. 16
Figure 16. Shoulder area after treatment with the new GWU 856-018 carbide bur. ×40. shows a general view of the ledge in the area of the preparation boundary formed by a carbide bur GWU 856-018 (×40). The electron diffraction pattern shows that the rounded shape of the shoulder clearly corresponds to the shape of the tool tip (see Fig. 13). As noted above, this configuration is considered optimal for most cast restorations [6]. It can be seen that the ledge area has a smooth, even surface. This is due to the fact that the cutting tip of the GWU 856-018 bur does not have transverse notches on the working blades, which in turn leads to the formation of a smooth dentin surface in this area (Fig. 17).
Figure 17. Electron diffraction pattern of the new GWU 856-018 boron. The cutting tip of the tool does not have transverse notches. ×30.
The relief of the axial wall of the stump corresponds to the features described above, although the ratio of the main relief elements near the preparation border is somewhat different from the surface relief in the middle third of the stump (see Fig. 12). It can be seen that near the preparation boundary, the distance between the tops of adjacent ridges is the same and is approximately 325 µm. In this case, the distance between the bases of adjacent ridges is reduced to 230 µm, but the ridges themselves have a greater width - 95 µm (325 µm - 230 µm = 95 µm) with the same height of 30 µm.
These differences are due
Types of ledges during preparation
Preparation of teeth with a ledge is a prerequisite for reliable fixation of the prosthetic structure in the oral cavity.
The most common methods of grinding teeth with a ledge:
- Knife -edge . The most commonly used type. Its width is only 0.3-0.4 mm. This is the best option for preparing inclined teeth and for solid metal crowns.
- Rounded grooved ledge ( Chamfer) . With a width of 0.8-1.2 mm, it allows maximum preservation of dental tissue. It is a classic option for metal-ceramic prosthetics.
- Shoulder ledge . The most uneconomical type with a width of 2 mm, requiring depulpation. However, it has the highest aesthetic characteristics and allows the crowns to be secured most firmly.
Grinding teeth without a shoulder is a serious mistake by the dentist, since the prosthetic crown will not be able to fit tightly to the tooth surface. And this will greatly complicate the care of dentures and increase the risk of developing caries.
When, in addition to turning, is an inlay or pin additionally installed?
After grinding the teeth, a metal-ceramic, ceramic or metal crown can be placed immediately, provided that the destruction of the prosthetic tooth is not too extensive. Otherwise, after finishing the turning, an inlay is placed in the tooth, which will increase the adhesion area with the crown and make the structure more durable. Here and there you can still find mention of pins used for the same purposes. However, progressive dentists consider this technique to be ineffective and associated with a number of complications, so today its use has practically been abandoned.
Features of preparation in children
Preparation of primary primary teeth in children is a serious problem in dentistry. Young patients are the most difficult group among dental office visitors due to the high prevalence of phobia of the sound and sight of a rotating drill. In addition, baby teeth have a number of anatomical features that do not allow “adult” manipulations.
Therefore, doctors are looking for alternative methods for preparing teeth for caries in childhood.
The most promising method in this case is considered to be chemical preparation, which does not cause negative sensations even in the smallest children, but at the same time allows for sufficient quality treatment of the carious cavity.
Preparation for veneers
Veneers are partial microprostheses, the main function of which is to improve the aesthetic appearance of the vestibular part of the front teeth. The main material used for their manufacture is ceramics. Enamel preparation plays a significant role when installing such prostheses, since the density and reliability of fixation of the elements directly depends on its quality.
The preparation of teeth for ceramic veneers occurs in a certain sequence:
- processing of the vestibular surface;
- turning the side surfaces;
- preparation of the cutting edge and palatal surface (if necessary).
«
When processing the vestibular surface, the thickness of the layer that needs to be removed is initially determined. Then grooves are created on the prepared part, serving as a guide for the doctor, along which the entire volume of hard tissue is ground. A ledge is formed at the gum level (the grooved one is most often used). In the process of processing the lateral surfaces, 2 options are possible: with the preservation of interdental contact points and with the extension of the preparation boundaries to the lingual side. In the first case, the overall integrity and stability of the dentition is maintained. With the second option, aesthetic indicators are significantly improved.
Depending on the veneer model and the required conditions for its installation, the cutting edge can be ground off or left unchanged. If there is a need to remove tissue from the lingual surface, then the preparation boundary should in no case coincide with the line of contact with the antagonist teeth.
Where to put high-quality crowns of any variety?
Regardless of whether you choose metal, metal-ceramics or ceramics as the material for prosthetics, you should only contact real professionals for crowns. After all, we are talking about a complex high-tech procedure that requires both the skill of all the specialists involved in it and the impeccable quality of materials. The service life and ease of use of a crown increase significantly if it is made using the most modern equipment, including computer modeling.
The Unident network is a clinic that combines all the components of successful prosthetics. Each of our dental centers is equipped with the latest technology, and we purchase materials and components only from reliable, world-famous manufacturers. And, of course, our main asset is our excellent specialists, who are capable of solving the most complex and non-standard problems. Add to all of the above also reasonable prices - and you will understand why Unident is so popular among patients.
Preparation for inlays: principles and rules
Inlays are partial dentures and are used to replace large defects in dental tissue.
Depending on the form, there are the following types of tabs:
- Inlay (inlay) - minimally invasive, since they do not affect the tubercles of the tooth;
- Onlay (onley) - serve to replace the internal slopes of the dental tubercles;
- Overlay - cover the entire volume of at least one tubercle;
- Pinlay (pinlay) - cover all dental cusps and have a special pin in their design - pin;
- stump inlays are a metal pin used in cases of severe destruction of tooth tissue and serving as a support for the crown.
Depending on the materials used, the inlays can be ceramic, metal or reinforced composite.
The main feature of preparing teeth for inlays is the need to create parallel side walls near the cavity for proper insertion of the finished structure, as well as to create sufficient depth for reliable fixation of the element.
Basic principles of turning for inlays:
- The prepared cavity must have an optimal shape for the smooth insertion and removal of the prosthesis. In this case, it is necessary to strive for maximum parallelism of the vertical walls. We allow only a slight angle of their deviation.
- The angle of transition of the cavity walls to the bottom should approach a straight line. The relationship of all walls should contribute to the uniform distribution of chewing pressure and maximum stability of the inlay.
- When forming the day, it is necessary to take into account that a minimum layer of tissue should remain above the pulp to ensure its protection from external factors. In adults, this value is 0.6 mm, and in children and adolescents - 1.4 mm.
- When forming complex cavities, additional fixation points should be formed to allow the inlay to be firmly fixed.
- When forming a cavity for metal inlays, it is necessary to create a bevel at the level of the enamel with a width of at least 0.5 mm and at an angle of 45°, which will ensure more accurate marginal contact of the prosthesis and tooth tissue.
- In the manufacture of metal-free structures, the presence of a bevel is contraindicated due to the fragility of materials with a small thickness.
Features of turning
When carrying out manipulation, you need to remember some features. The main feature is the creation of a special ledge - circular or vestibular. This ledge is necessary in order to subsequently create the edge of the crown part, which is necessary for veneering the ceramic part of the crown. In addition, thanks to the pre-created ledge, the edge of the installed and fixed crown will not injure or injure part of the soft tissue of the gums with which it will come into contact.
Video - Turning with a ledge
- Metal-ceramic crowns - how to save a tooth
Further manipulation and creation of a special ledge depend on the facts of clinical manifestations, such as:
- the degree of destruction of the desired tooth;
- placement of the tooth cavity;
- height of the created metal-ceramic crown;
- patient's age.
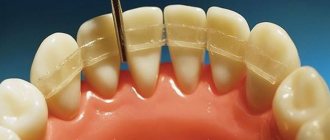
The use of special attachments allows you to control the thickness of the edge of mineralized tissue being ground. Using these attachments, you can create special marking grooves, which will later serve as a guide for the specialist. The bottom of the groove should be at the same level as the edge of the gum, this will mean that the necessary part of the tooth has already been cut down, and further manipulations can begin.
Marker burs
Teeth must be prepared for further installation of metal-ceramic crowns. This is done with specialized diamond-coated or carborundum-coated nozzles. These types of nozzles can be in the shape of a needle or a flame.
Strong discrepancies in the surfaces that should be in contact make it impossible to install a metal-ceramic crown. Otherwise, a strong touch worsens the process of fixing the crown, which can further lead to injury to the loose and fibrous building tissue of the tooth.
After removing unnecessary tissue between the teeth, several thin, special attachments, cylindrical or cone-shaped, are used and the entire surface that will be in contact is treated. Next, a special ledge will be formed.
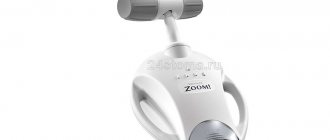
The Zekrya gum retractor is designed to protect the free edge of the gums during the preparation process.
Marking grooves
The depth of the periodontal groove at the midpoint on the vestibular side is 2.0 mm
Measurement in the interproximal region, the probe is immersed 4.5 mm, with a sulcus depth of 2.5 mm
A retraction thread was inserted into the periodontal groove of tooth 1-1 to protect the epithelial attachment
Marking grooves are applied in the direction from the incisal to the gingival edge
A carbide bur is used to smooth the surface of the stump
Sanding hard fabrics
The preparation ends with the formation of a ledge
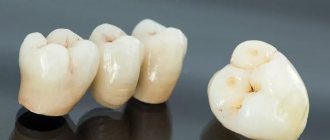
Preparation (turning) for various types of crowns
A dental crown is a kind of “cap” that is placed on a healthy or damaged tooth. The main task of such a design is to restore the functions of the entire dentition.
The following types of crowns exist:
- Metal - made only of metal: sewn;
- stamped;
- metal-ceramic - consist of a metal frame lined with ceramic mass.
- porcelain;
Features of crown preparation:
- Grinding for solid metal crowns begins from the side surfaces, which eliminates damage to adjacent teeth, after which up to 0.3 mm of hard tissue is evenly removed.
- Preparation for metal-ceramics involves preliminary depulpation of the tooth, followed by the removal of 2 mm of tissue on each side. It is mandatory to create a ledge, the width of which depends on the model of the prosthesis. The walls of the stump must have a pronounced roughness for reliable fixation of the elements.
- The correct preparation technique for a porcelain crown involves giving the stump a conical or cylindrical shape. A rounded ledge is formed, which is immersed into the gum up to 1 mm (on the palatal surface it can be left at the border with the gum).
- Preparation for a zirconia crown should be carried out with a clearly visible margin, forming a rounded or shoulder shoulder. When treating anterior teeth, the thickness of the tissue removed should not exceed 0.3 mm, and for the chewing group - 0.6 mm.
Does it hurt to put a crown on a tooth?
Having heard from the doctor that a crown will need to be placed on the tooth, the patient usually immediately begins to wonder - how painful and unpleasant will the procedure be for the patient? Let us answer this question honestly and in detail - unpleasant sensations cannot be completely eliminated during the treatment process. The most unpleasant part will be the preparation for prosthetics, during which the doctor will drill out the tooth, remove tissue damaged by caries, and also create access to the tooth canals.
The procedure for drilling a tooth, as well as treating its canals, can be very painful for the patient, so local anesthesia is required before performing these manipulations.
Modern clinics use strong anesthetics that can block pain impulses for several hours, and this time is usually enough for high-quality treatment of the tooth and its preparation for installation of a crown. The anesthetic is selected for the patient individually, taking into account possible contraindications and allergic reactions. But the process of installing dental crowns is painless for the patient, since the finished prosthesis is placed on pulpless teeth from which the nerve bundle has been removed.
Preparation for a prosthesis
All dentures are divided into 2 groups:
- Removable: plate plastic (acrylic) or metal;
- clasp dentures;
- nylon.
- bridge-like;
When installing dentures, tooth preparation takes place only in the case of fixed prosthetics with bridge structures. All other options (removable and implant prosthetics) do not require the removal of part of the enamel or dentin tissue.
When grinding teeth for a bridge, the basics and rules of technique are very similar to those when preparing for metal-ceramic crowns.
Preparation during splinting
Splinting is the optimal method for preventing and treating tooth loosening due to periodontal disease, since this technique guarantees reliable long-term fixation.
Types of tires:
- Pin splints are fixed on the teeth using pin structures that are immersed vertically into hard dental tissues.
- Beam splints are metal structures with crowns at the ends, which are located in grooves on the lingual surface of the teeth.
- Inlay splints are polymer tapes that are attached to the inside of the teeth.
Tooth preparation during splinting is carried out depending on the type of structure, while trying to preserve the volume of hard tissue as much as possible. Often there is a need for depulpation.
Which crowns do you prefer: metal, ceramic or metal-ceramic?
Each of the varieties has its own advantages and disadvantages. The metal is durable and inexpensive, but does not imitate natural teeth and is noticeable in the mouth. It is used for dental prosthetics in the back of the mouth. Ceramics, on the contrary, are completely invisible to others, but are significantly more expensive and less durable. Its main area of application is incisors in the smile area, which are less likely to bear chewing loads. Metal-ceramics are often recommended for dental prosthetics, which combines the advantages of two materials: at a reasonable price, metal-ceramics has high strength and is almost indistinguishable from natural teeth.