Little children grow so quickly that you don’t have time to keep track of them. So he turned over for the first time, smiled, said “mom”, went... got married. And I really want to remember every pleasant moment of this charming child’s life, to capture the little hands and feet in my memory. Today, newfangled trends are coming to the aid of young mothers, thanks to which they can make casts of the arms and legs of their little children. Let's look at several ways to “freeze the moment” and capture the tiny, adorable limbs of a child.
There are a lot of offers on the Internet for creativity kits, with which you can make prints of your baby’s arms and legs with every visible fold on the palm and foot. After all, you must admit that making a collage of photographs, arms and legs in 3D format is an exclusive art, looking at which you will be illuminated with a smile every time.
It is very popular today to bring such gifts to christenings or buy a certificate for this service as a gift. After all, when the godson grows up, he will probably remember his godparents with gratitude. What else can you give to your godson? Read the article: “What to give for christening? Traditional and modern gifts. What do godparents and ordinary guests give?” Parents can also order hand impressions on a Hollywood Walk of Stars style stand. You can make casts of arms and legs yourself, but how? See below.
Colorful traces
The first thing that comes to mind to immortalize the hands and feet of a child is to dip them in watercolor or gouache and print them on plain paper or cardboard. Yes, this is not the most original method, but it is inexpensive and fast. To preserve this sheet for a long time, you can either laminate it or put it in a beautiful stretcher.
Basic requirements for products
In dentistry, there are a number of requirements for impressions:
- products must accurately follow the contours of the soft tissues that will come into contact with the prostheses;
- when removed from the oral cavity, the print should not be deformed;
- during storage, the impression should not shrink significantly;
- materials used to create the product must be disinfected without loss of quality;
- The print must be freely separated from the model made from it.
Plasticine legs
Another simple option for making casts of children’s hands and feet with your own hands is plasticine. The best choice is one that hardens itself in the air, or a special mixture for modeling. The mass should be flattened into a medallion and the baby’s hand or foot should be well imprinted in it. Be sure to make a hole before the plasticine dries so that the “home heirloom” can be hung on a ribbon.
general description
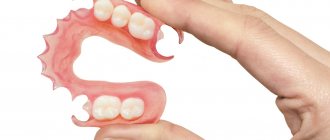
An impression is an impression of one or all elements of the dentition, according to which models of future designs for prosthetics are cast in laboratories.
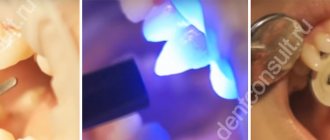
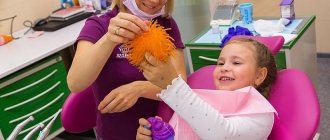
The scope of application of impressions is orthopedic dentistry. When taking an impression, the specialist uses impression trays, as well as various types of materials - plaster, silicone, etc. Impressions are made before making corrective devices.
Casts are also used for aesthetic purposes, such as bleaching units. Silicone mouth guards are made based on tooth imprints, which are used to perform remineralization restoration of elements.
Using impressions, you can make a diagnostic model and determine the type of dental disease.
Salt dough print
Many of us sculpted “salted” figures as children, and now, having become parents, salted dough will help us capture the tiny fingers of our babies. So, how to make casts of children's hands and feet from salt dough?
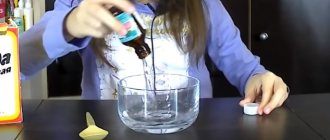
Dissolve half a glass of salt in a glass of water and add about a glass of flour (more is possible until the dough begins to stick to your hands). We divide the resulting mass into 4 equal parts and roll it out with a rolling pin into flat round pieces a couple of centimeters thick and the size of a child’s hand and foot. With the baby's dry, clean palms and feet, we press deeply onto each piece. If the cast is unclear or you don’t like it, you can roll the dough again and repeat the procedure.
When the cast is ready, let the dough dry for 2-3 weeks. After this, the dough can be painted with acrylic paints. As you can see, this method is quite painstaking, but the result will be durable and original casts of the child’s arms and legs made from salt dough.
Types of impressions
Impressions are divided into anatomical and functional. In the first case, the construction is manufactured without taking into account the characteristics of the tissues that are located on the border of removable dentures.
In the process of creating functional structures, medical instruments are used, selected in accordance with the individual characteristics of the patient.
Due to this, the mobility of the soft tissue folds located on the border of the implantation bed is reflected on the impression. A functional impression is indicated for patients who have lost all or part of their teeth.
Functional type products are classified into types:
- Compression. Used to take an impression of the lower jaw.
The products reflect the relief of the base of the prosthesis and allow you to redistribute the load during chewing over a larger area of its base. Due to this property, premature atrophy of bone structures is prevented. To make a compression print, materials with high viscosity values are used. - Unloading. The base of the prosthesis made from the unloading cast will have the shape of uncompressed mucous membranes.
This type of device is recommended for people whose professional activities involve speaking. The load during chewing will be distributed unevenly due to the mismatch between the relief of the bone tissue and the base of the prosthesis. - Combined. Necessary for creating devices that compress the pliable and unload the sedentary areas of the mucous membranes of the mouth located in the prosthesis area.
Thanks to differentiated impressions, implants are created that provide an even load during chewing or speaking.
Salt dough and plaster cast
An even more meticulous and unusual way to get prints (casts) of children’s hands and feet with your own hands is to plaster them.
To do this, we make the dough according to the recipe described above, and form prints in the same way, and it is better to make 2 times more dough so that the print is as deep as possible (2-3 cm in depth). We take plaster (a creativity kit from special art stores for children is best, but a construction kit can also be used). We dilute it with water in the proportion of 1 cup of gypsum to half a glass of water (it is important to add water to the plaster, and not vice versa). Add 2-3 spoons of PVA glue to make the resulting cast stronger. Mix everything very quickly and pour it into the mold with the dough.
Before the mass hardens, it is better to wipe off all the unsightly edges with a cloth, otherwise you will have to file them off later, which could damage the shape. Let the cast of the child’s hand (foot) harden with your own hands for a day. Plaster usually dries quickly, but in order for everything to turn out well, it is better not to touch it for several hours. After which the finished cast can be removed from the dough. We sand all the unevenness with sandpaper. You can decorate such prints with acrylic paint or make an interesting collage of children's photographs with them. The main thing is to approach the process with imagination!
Preparatory operations
Making a plaster hand on your own is possible at home without the use of any special technologies or special equipment. However, in order for the casting process to go smoothly, you need to carefully prepare. Different batches of gypsum (especially building gypsum) may have different setting times.
To find out for sure, it is best to carry out a test batch and pour a small amount of solution into any simple form. This will allow you to accurately calculate the proportions of gypsum and water and determine the time period within which the solution retains casting properties. Ultimately, this will help save material, time and nerves.
At the preparation stage, they determine the container for the mold, and also select a suitable vessel for mixing the gypsum solution. For one-time pouring, you can take disposable dishes. If you plan to continue casting, it is best to purchase rubber plaster for mixing the working solution.
Half of an old children's ball is suitable for these purposes. Dried plaster from the walls is easily peeled off when the rubber is deformed. The skin of the hand that will be immersed in the molding mass can be lubricated with a thin layer of castor oil or Vaseline.
Sand casts
Another way to make your own impressions of children's hands and feet is to use sand instead of dough. The operating principle is the same. Pour sand into a deep container, moisten it with water so that it turns into a thick mass, but does not float in the water and the child’s print does not spread. We lower the baby’s leg or arm deeper (1-2 cm) so that an imprint remains, and take it out. Then we lower the plaster into the resulting mold (the proportions are described above) and leave it for several hours to harden. Then shake off the excess sand.
Features of the technology
Gypsum powder should be stored in a dry place. Wetted or damp material is unsuitable for casting; it does not set. Its characteristics also deteriorate from long-term storage. The gypsum working solution is prepared quickly. Due to prolonged stirring, it “rejuvenates” and sets weaker, which ultimately leads to a loss of strength of the finished product.
If the working solution has hardened before pouring is complete, it is no longer suitable for use. Adding water and stirring it again will not correct the situation. Liquid glue can help slow down the setting of the solution. It (3-4 spoons per bucket of water) is added first and mixed well.
The casting must be dried at temperatures up to 60 degrees. It is not advisable to exceed this limit - the material loses strength and begins to decompose. A do-it-yourself plaster hand is made taking into account all these nuances. To make the finished product stronger, the solution is mixed with lime milk.
Moisture and dampness have a negative effect on gypsum products, so they must be used and stored indoors, especially if they do not have a protective coating.
Casts from the finished set
Here were several ways to make casts of children's hands and feet with your own hands, but you can also use ready-made kits for creativity. They allow you to create high-quality “handles” and “legs” without using improvised tools; you just need to follow the instructions. There are 2D sets (only with prints), 3D (full palm and foot), as well as with the possibility of making a cast of a child’s hand together with an adult hand, casts in a frame, on a stand, in an album, with an engraved plaque and much more. The only drawback of this method is the high cost, but those who really know a lot about original and memorable items will appreciate it.
Finishing
How to make a plaster cast of a hand into a finished composition? To do this, it needs to be painted. For some, the ideal option would be tinting with gold or bronze paint. Another will choose nude or white.
Acrylic emulsion is suitable for decorative coating, but its layer, although thin, can smooth out small lines and folds on the cast. Although, if the copy turned out to be imperfect, then this option is quite suitable. If you need to preserve the smallest details, it is better to use spray paint.
Before finishing, the cast is inspected, all irregularities are polished, and defects are corrected. In order for the paint to lay down in an even layer, the workpiece can be pre-primed, allowed to dry and then sanded again with fine sandpaper.
For installation, select a decorative base at your discretion and mount a copy of the hand or a composition with it on glue. After drying, the souvenir can be varnished for greater effect.
Price
The price of a print depends on the following factors:
- Features of the pathology. For example, in edentulous cases, individual dental trays are required to make impressions. This increases the cost of the procedure.
- Type of material. Typically, specialists do not use expensive raw materials when cheaper materials, for example, alginate, can be used.
On average, casting a plaster model will cost patients 300 rubles, and making an alginate impression costs the same. A silicone impression will cost more – from 550 rubles.