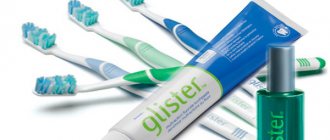
ProRut is an excellent material for restoring tooth roots:
- simple application technique
- new tooth-colored formula
- biocompatibility
- water-based, good curing in humid environments
- absence of marginal permeability and prevention of bacterial invasion
- restoration of soft tissues without inflammation
Possessing unique properties and features, ProRut MTA has significant advantages over other materials for restoring root dentin:
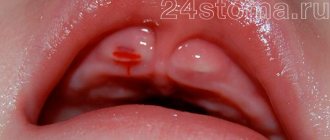
Elimination of perforation of the bottom of the tooth cavity. Perforations as a result of clinical errors represent a communication between the dental cavity and periodontal tissues. ProRut MTA can seal perforations.
Elimination of root resorption. Internal root resorption as a result of an idiopathic condition manifests itself in the form of decay or destruction of root structures. The material can close defects during resorption.
- Retrograde filling of the root apex. Sealing the root apex is necessary in cases of endodontic treatment when a surgical (extraradicular) method is used. ProRuth MTA has excellent sealing ability and promotes periradicular healing as a retrograde filling material for apical root resection surgery.
- Protective pulp coating. In certain clinical situations, vital pulp treatment is indicated. Applying the material to the exposed pulp will in most cases result in healing and preservation of pulp vitality without additional treatment.
- Elimination of root perforations during endodontic treatment. Perforations as a result of clinical errors represent a communication between the root canal and periodontal tissues. ProRut MTA can close root wall perforations.
- Apexification. It is an excellent material for apexification because it seals the root tip, providing further sealing of the canal.
General overview
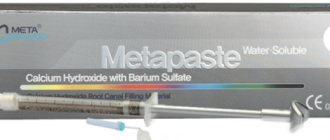
ProRoot MTA is a mineralized trioxide aggregate, crushed to the state of a fine hydrophilic powder.
In dentistry, this material is used as a protective cement during endodontic root canal treatment of teeth.
The peculiarity of the mass is its uniform solubility and hardening when interacting with liquid.
During the dissolution process, the powder first takes on the consistency of a homogeneous gel, which, when subsequently applied to the working area, hardens, creating a mechanical barrier that prevents damage and destruction of the walls of the root canals.
Operating principle and properties
The principle of action of the drug ProRut is the mechanical coating of the walls of the root canal, which leads to its restoration and prevents further destruction.
Thus, ProRoot is capable of sealing holes between periodontal tissues and the tooth cavity if it is necessary to treat dental perforations.
During the apexification procedure, the cementing material is able to isolate the apical part of the root, sealing the canal.
During the procedure for eliminating root resorption, ProRoot covers defects on the root surface , and during retrograde filling, it prevents moisture and bacteria from penetrating under the filling.
Additionally, ProRoot can be used to provide a protective pulp cap to restore tissue vitality.
Thus, the action of ProRut is multifunctional and can be used in various ways during treatment.
Advantages and disadvantages
The mass has a number of advantages that distinguish it from other cements:
- The material is sealed. This property makes it possible to exclude the proliferation of pathogenic bacteria and the penetration of liquids into the root canal, which is the key to successful restoration of dental root tissue.
Research shows that ProRut's hygiene indicators are much better than its direct analogues. - It practically does not cause rejection among patients, since only high-quality and safe elements are included in the composition.
- Able to harden even in humid conditions , which is especially important in dentistry, where drying the working cavity is not always possible.
The disadvantages of the material include a short working period after mixing (only 5 minutes) and the possibility of lack of hardening during installation.
However, the second drawback is offset by the fact that the material can be easily removed from the cavity without harm to the patient, and the procedure can be repeated again.
Use of MTA in general dental practice
Modern endodontics derives many benefits from the use of magnification, and especially the operating microscope. However, as a recognized expert in the field, I know that many general dentists do not have the luxury of this sophisticated technology. But dental telescopic lenses are available (photo 3), the price of which will suit all practicing dentists. Their ability to increase by 2-3 times is sufficient to perform various numerous procedures for the use of MTA cement in the root canals of teeth. The following examples illustrate techniques using MTA cement that can be implemented in general dental practice with minimal magnification.
Purpose of the drug
Indications for use are:
- filling the upper part of the tooth root;
- restoration of the integrity of the canal openings in the root and the role of a blocking element;
- during the channel update in the system during procedural treatment;
- used for direct pulp capping.
There are no restrictions or contraindications for use.
It is important to know:
- Containers with the drug Pro Root, intended for restorative operations of the root system of teeth, are prescribed to be stored in a place inaccessible to moisture, securely packaged and away from sunlight.
- The product must be applied immediately after mixing it with water to avoid dehydration during shrinkage.
- This material should be used no higher than the root of the tooth and pulp, because due to its natural characteristics it can give such an unpleasant effect as loss of color of tooth enamel.
Indications and contraindications
The paste can be used to solve the following clinical problems:
- Sealing may be indicated when performing a resection of the upper part of the root.
- Protection. If the pulp is viable, applying ProRoot material to it can speed up the resolution of the inflammatory process and maintain the functionality of the pulp chamber without additional intervention.
- Elimination of perforations of dental cavities during endodontic treatment.
- Apexification.
The product has no contraindications, except in cases of individual intolerance to the drug.
Reviews
If you had a chance to try ProRoot material on yourself as a patient, or you are ready to share your thoughts about this product from the position of a specialist, leave your review in the comments to this article.
Personal experience from use gives the reader the opportunity to form a more complete opinion about the product than the information given by the manufacturer.
If you find an error, please select a piece of text and press Ctrl+Enter.
Tags filling fillings
Did you like the article? stay tuned
Previous article
Features of the course and treatment of chronic fibrous pulpitis
Next article
Subtleties of practical dental restoration using the GlassSpan system
Advantages of Prorut
Possessing unique properties, the material has a sufficient number of advantageous differences from its analogues:
- ease of use;
- high biological compatibility;
- hardening in an environment with high humidity;
- no inflammation of soft tissues during use.
It also performs a number of functions, such as:
- complete pulp closure;
- seals the upper part of the tooth and root, thereby ensuring complete closure of the defective area;
- Prorut applied to the pulp promotes faster and painless healing;
- forms renewed cement cells;
- reduces bacterial contamination compared to other similar materials;
- Thanks to its unique characteristics, it ensures complete and reliable hardening even in an environment with a high moisture content - treatment and renewal of the damaged tooth root.
Resistance to edge permeability
Creates a stable barrier against the penetration of bacteria and liquids - one of the key factors in the clinical success of the material for root dentin restoration. See diagrams 1 and 2. Diagram 2 shows the percentage of dye permeability when sealing perforations without blood (white bars) and with blood (red bars).
To reduce the risk of bacterial infection, the root dentin restoration material must block the communication pathways between the root canal system and adjacent tissues. Otherwise, bacterial migration occurs. Diagram 3 indicates the minimum size of the marginal gap between the sealing material and the root walls in comparison with analogues, which allows us to judge the progress of bacterial protection technologies.
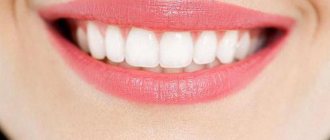
Biocompatibility. Good clinical result
ProRut MTA promotes soft tissue healing without the stage of inflammation, including the formation of new cement cells on the restored root surface. ProRuth MTA has excellent biocompatibility with soft tissues. Documented histological studies have shown that ProRut MTA provides a good clinical response and successful outcome even with retrograde obturation of the root apex. Visual proof is in x-rays (see below, Fig. 1-8)
Curing in a humid environment
Humidity is not a problem
The water-based ProRut MTA cures well in a humid environment. In a clinical situation where complete moisture removal is not always possible, ProRut MTA, due to its ability to cure in a moist environment, is ideal as an effective root restoration material.
This is interesting: What is the best anesthesia for dental treatment during pregnancy?
Despite its high cost, mineral trioxide aggregate (MTA) is becoming an increasingly popular material in the practice of endodontics and restorative dentistry. MTA consists of 80% ordinary Portland cement (OPC) with the addition of 20% bismuth trioxide, which provides radiopacity to the material for subsequent verification on X-ray images.
Despite the fact that the indications for the use of MTA in pathologies of primary teeth are obvious, the study of methods for its use is not unified across training programs at different dental faculties, which is to some extent due to its high cost. Thus, all information on the use and operation of MTA is reduced only to “instructions for use” and various clinical cases published in the literature. Although the described clinical studies of physicians using MTA can be used as additional educational material, they still do not provide all the necessary information regarding the step-by-step algorithm for practical manipulation of the material and the subsequent effect of these steps on the likelihood of clinical success. Since MTA is primarily Portland cement (OPC), it is advisable to review the literature on the use of OPC in the construction industry, and, having identified the key factors of the latter, draw logical parallels between it and aspects of clinical practice of application in dentistry. The clinical cases described below generally complement and detail the manufacturer's instructions for the use of MTA.
Interaction with water and mixing characteristics
Portland cement in the construction industry is most often used in combination with sand, gravel and water, when mixed to form regular concrete. Sand or gravel (referred to as aggregate) acts as a filler that provides additional strength to the final product, resulting in it being more resistant to heavy loads that must be taken into account, for example, in the construction of buildings, roads and bridges. When mixed, OPC reacts with water to form calcium silicate/hydroaluminates: (CaO)3(Al2O3)6H2O and (CaO)3(SiO2)24H2O), calcium hydroxide and water.
Finally hardened cement has a crystalline structure with voids containing water and calcium hydroxide. Despite its solid appearance, the material is not completely solidified, but rather exists in a specific associated liquid state, similar to the water contained in a wet sponge. During the reaction, the needle-shaped crystalline hydrates form a matrix that binds all the containing particles together and, in effect, transforms the original mixture of powder and liquid into a solid state, or colloidal gel. If water evaporates into the atmosphere during the solidification reaction, it significantly weakens the characteristics of the final reaction product. Therefore, loss of moisture during MTA curing is an extremely unfavorable condition that should be avoided.
Effect of acids on hardened material
When hardened cement comes into contact with acids, it loses its calcium hydroxide state as hydroxide ions begin to participate in acid-base reactions. This leads to the loss of hydration structures and thereby creates an etching effect on the surface. The procedure for one-time use of hydrochloric acid allows you to clean and etch the surface of both the unit and the matrix, however, contact with any other acids is contraindicated. In addition, exposure of MTA to strong acids causes etching of the material surface, which occurs due to the loss of calcium hydroxide from the structure of the hardened cement, as hydroxyl ions begin to react with the acid, which, as a consequence, leads to the dissolution of calcium silicate hydrates. Fluids from the environment when in contact with cement can renew lost calcium hydroxide or hydrates depending on the ions present in these fluids.
Presence of acids during mixing
In the construction industry, acidified water is never used in the concrete mixing process. This component leads to the formation of intermediate compounds that slow down the hydration of cement and limit the formation of calcium hydroxide. In addition, acids decompose both the structures of calcium silicate hydrates and calcium hydroxides. In the presence of acids, the compounds that form during solidification become more susceptible to dissolution, and this disrupts the formation of a network of intertwined crystals and also leads to their multiple leaching from the structure of the material. Even before pouring concrete on acidic soil, a process of so-called chemical stabilization or soil conditioning is carried out by first mixing the soil with an alkaline material (calcium oxide or hydroxide) until a neutral pH level is reached, and only then is cement laid.
From a dental point of view, “acid soil” includes deep caries (with the presence of organic acids in dentin), large numbers of bacteria, for example, in contaminated root canals, together with their acidic waste products and metabolites, as well as inflammation, for example, of periapical tissues. An acidic pH level can be found at the site of necrosis and inflammation.
As in construction, the presence of acids at the site where MTA is used negatively affects the hardening reaction of the cement. When the pH level of the medium decreases from 7.4 to 4.4, the probability of microleakage in the areas of the MTA edge contact increases significantly, and the strength of its adhesion to tissues, on the contrary, noticeably decreases. The action of an acidic environment also negatively affects the microhardness of hardened MTA, reducing its performance, and the microstructure of the material’s crystals changes from strict cubic and needle-shaped forms to an erosive-defective cubic form of the crystalline network. Therefore, the pH level must be stabilized and approach physiological normal values even before applying MTA. For example, filling the root canal of an abscessed tooth with calcium hydroxide for 1 to 2 weeks before placing MTA significantly improves the properties of the set cement. In addition, during apexogenesis of vital teeth, periodic treatment of the roots with calcium hydroxide can not only stimulate reparative processes at the apex of the tooth, but also help disinfect the canal.
It is believed that pre-treatment of the channel with calcium hydroxide may adversely affect the properties of MTA used as a sealer. This is likely due to the difficulty of completely removing residual calcium paste, which may act as a barrier to the adaptation of MTA to the root canal walls and also participate in the curing reaction of MTA. However, this view is contrary to the literature in the construction industry, which, on the contrary, recommends the use of calcium hydroxide to condition acidic soil. However, calcium hydroxide materials used in dentistry may contain various additives, such as methylcellulose and carboxymethylcellulose, which are known to slow down the curing process of Portland cement. Therefore, if calcium hydroxide pastes are still used, then to ensure quality, abundant irrigation and rinsing of the material should be carried out so that residual cellulose thickener does not in any way inhibit the MTA curing process. Accordingly, acid irrigants, pickling solutions and conditioners must also be properly washed out before applying MTA. Sodium hypochlorite (NaOCl) solutions, which have pH values above 11, will neutralize any remaining acids during root canal irrigation. As discussed earlier, the presence of acids can affect the hydration process of MTA, resulting in the formation of new compounds within its matrix structure that act as inhibitors of the chemical reaction. NaOCl, reacting with bismuth oxide, turns the yellow X-ray contrast powder into dark brown. To avoid darkening of the MTA due to the use of NaOCl, the prepared area should be rinsed copiously with saline. Given the darkening effect of the material, Belobrov and Parashos do not recommend the use of white MTA in the aesthetic zone, and in case of pulpotomy due to traumatic pulp exposure, use only calcium hydroxide.
Interaction with EDTA
Some commonly used irrigation solutions are not acidic (for example, disodium edetate has a pH value of 7.0-7.4, and tetrasodium ethylenediaminetetraacetic acid has a pH value of up to 11.3). The problem with ethylenediaminetetraacetic acid (EDTA) is not primarily its pH level, but the chelation effect that occurs. EDTA has 6 potential zones for binding positively charged ions, such as metal ions. Calcium ions, in turn, are important reagents in the hardening of Portland cement and MTA. If an EDTA solution is used to remove the smear layer during endodontic treatment and is not washed away properly, the residual EDTA will chelate calcium ions, thereby interfering with the precipitation of hydration products during the setting reaction. This explains the results of a study by Lee and colleagues, who observed that MTA placed in an EDTA solution loses its crystalline structure as the Ca/Si molar ratio drops. In addition, MTA treated with an EDTA solution has reduced microhardness and is less biocompatible, due to reduced fibroblast adhesion, compared to MTA that was not treated with EDTA.
Interaction with phosphoric acid
It follows from the above that phosphoric acid used to etch the prepared surface must be thoroughly washed off before installing the MTA. This recommendation should be especially taken into account in deep cavities or when cleaning pulp, which also contains organic acids of bacterial origin. Even in small quantities, phosphoric acid affects the curing reaction of MTA, reducing the microhardness of the material. Therefore, the etching agent should always be thoroughly flushed with water from the walls of the prepared cavity before inserting the MTA. Additionally, the MTA can be coated with glass ionomer cement (GIC) as a final step before etching the marginal region of the cavity. In most cases, the easiest way to limit the effects of etching solutions and EDTA is to irrigate and flush the problem area with plenty of water before applying MTA.
Substance contamination
The general principle of construction is simple: the higher the level of chemical impurities in the solution, the more likely it is that one or more of them will interfere with the hardening reaction of the cement, resulting in a decrease in its compressive strength. When MTA comes into contact with blood, its physical properties deteriorate: compressive strength and microhardness decrease, and tensile strength also decreases. In addition, in the presence of blood serum, the MTA hardening process is disrupted due to changes in the morphology of the contacting surface and a decrease in the level of microhardness, which, in general, slows down the reaction time. Although MTA's ability to cure in wet or blood-contaminated environments is a proprietary characteristic, it is desirable to minimize the possibility of any tissue fluids or blood coming into contact with MTA during application. This is especially important to consider in the area of cement edge contacts, where the possibility of microleakage is quite high, which can deteriorate the physical properties of the material. Dental practitioners must minimize the possibility of hemorrhagic contamination by all means possible, as excessive blood will not only impair visual control, but may also affect the curing quality of the final product.
MTA Liquid Component Variations
Various additives and impurities in the water when mixing concrete are already known to affect the curing reaction and the quality of the final product. Sodium chloride (as a component of saline solution) and many other inorganic and organic compounds are likely to slow down the curing process due to the formation of reaction by-products. Manufacturer's instructions for using MTA usually recommend using sterile or distilled water to mix with MTA powder. To provide passive quality control and clinician convenience, distilled water is often included in the same kit with MTA powder. Although MTA powder will harden when mixed with local anesthetic solutions, the reaction will be slower and the hardened material will have a lower level of compressive strength. When mixed with a NaOCl solution, MTA cures faster than when mixed with distilled water, but the compressive strength also has to be sacrificed. However, in situations where the cement is outside the immediate load area, this problem is not significant. In many cases, the benefit of an accelerated setting reaction, which is a reduced risk of potential for movement or separation of the restoration, must be justified in light of the reduced physical properties of the material. When using chlorhexidine gluconate as an alternative to sterile mixing water, there is no question of choice because this agent completely inhibits the MTA setting reaction.
Cement curing
The reaction of Portland cement with water is dynamic, so contact between the material and water must be maintained throughout the curing process of the material to ensure optimal structure and strength of the final product. If water evaporates, the strength of the cement is lost. In construction, there are even a number of techniques for minimizing water loss during the curing process, among which a certain place is occupied by the wet curing technique (pouring cement with water to compensate for evaporated liquid) and the membrane curing technique (coating cement with waterproof membranes to prevent evaporation). In clinical practice, the wet cure technique involves placing a damp cotton ball on the surface of the MTA while it cures. However, if the cotton ball is too dry (or at least drier than the cement surface), water will move in the opposite direction, from the cement into the cotton wool, thus weakening the MTA. If the cotton ball is too wet or was placed too early, this will also deteriorate the properties of the cement. The use of cotton balls delays the completion of the clinical procedure and may compromise the quality of the MTA restoration.
Based on the principles of membrane adhesion, in a clinical setting, MTA can be covered with GIC or a GIC liner modified with a composite. This procedure ensures the stability of the material, both in terms of water loss and in terms of its excessive absorption, and the clinician, in turn, can proceed to the final restoration of the tooth or obturation of the canals. This concept was tested using white ProRoot MTA (Dentsply, Johnson City, USA), which has an initial setting time of 45 minutes. GIC placed on top of MTA provides, after 45 minutes, bond strength to dentin similar to that of GIC after waiting 72 hours for MTA to fully cure. Therefore, there is simply no apparent advantage to leaving the MTA for several days to fully harden compared to restoring the tooth in one visit. However, there are not yet any well-founded studies that can evaluate the impact of coating MTA with GIC less than 45 minutes after its application. An alternative to GIC for MTA coating is the use of self-etch adhesives as a waterproof layer. In one study, a bonding agent was applied to the surface of the MTA 10 minutes after installation. As it turned out later, this approach did not affect either the Vickers microhardness of MTA or the bond with the adhesive agent compared to waiting 1 or 7 days after installing the cement itself. Again, this study only supports the postulate that it is possible to restore a tooth with composite cement with underlying MTA placement in a single visit.
MTA storage
Portland cement powder and MTA powder are highly hygroscopic, and when interacting with atmospheric air, they will absorb moisture from it, which will initiate the hydration process. Portland cement can be packaged in sealed bags and containers of appropriate size, but the issue of MTA packaging remains unresolved as some products are sold in reusable bottles. Recent studies have shown that opening a sealed container changes the particle size of the remaining MTA, which subsequently inhibits the curing process and reduces material quality. Disposable packaging in this case is the ideal solution. Alternatively, sealed containers can also reduce structural changes in the material during storage. The rate of hardening reaction of Portland cement decreases under low temperature conditions. Additionally, MTA stored in a refrigerator exhibits a significant decrease in surface hardness, greater porosity, and increased levels of microleakage, so storing MTA in such conditions should be avoided.
conclusions
This analysis of some of the characteristics of MTA provides a more accurate understanding of the material and its clinical use in dentistry.
Authors: William N. Ha, BDSc, GCResComm; Bill Kahler, DClinDent, PhD; Laurence J. Walsh, PhD, DDSc.
Instructions for using ProRoot MTA:
Restoration of perforation after resorption
- After applying the Rubber Dam, clean the root canal of sawdust and half-life products, using root canal instruments and irrigating the canal with solutions containing NaOCI.
- Place a temporary filling to close access to the cavity.
- After one week of applying Rubber Dam, remove CaOH from the root canal system using root canal instruments and irrigating the canal with solutions containing NaOCI.
- Dry the canal with paper points and identify the root canal defect area.
- Perform obturation of all canals in the apical zone from the established defect area.
- Prepare the Prorut AM material according to the attached instructions.
- Using the supplied application probe, place the material into the defect area. Compact the ProRoot MTA material into the cavity using a small amalgam plunger and a cotton swab or paper points. Attention: You can condense the material using a large ultrasonic nozzle without spraying water, at medium power.
- Make sure you have placed the ProRuth MTA correctly using the x-ray. If an adequate barrier has not been created, wash the ProRut MTA material with water from the defect area and repeat the procedure.
- Place a moistened cotton swab into the cavity and seal the canal with temporary restorative material for at least 4 hours.
- After 4 hours, or during your next appointment, using Rubber Dam, inspect the ProRuth MTA material. The material must be hard. If it doesn't, wash it and reapply.
- Once the ProRoot MTA material has hardened, obturate the remaining portion of the canals. ProRuth MTA should remain as a permanent part of the root canal filling.
Repair of perforation of lateral root canals
- After applying the Rubber Dam, clean the root canal of sawdust and half-life products, using root canal instruments and irrigating the canal with solutions containing NaOCI.
- Dry the root canal system with paper points and isolate the perforation site.
- Obturate all canals located apical to the perforation.
- Prepare the Prorut AM material according to the attached instructions.
- Using the supplied application probe, place the material into the defect area. Compact the ProRoot MTA material into the cavity using a small amalgam plunger and a cotton swab or paper points.
- Make sure you have placed the ProRuth MTA correctly using the x-ray. If an adequate barrier has not been created, wash the ProRut MTA material with water from the defect area and repeat the procedure.
- Place a moistened cotton swab into the cavity and seal the canal with temporary restorative material for at least 4 hours.
- After 4 hours, or during your next appointment, using Rubber Dam, inspect the ProRuth MTA material. The material must be hard. If it doesn't, wash it and reapply.
- Once the ProRoot MTA material has hardened, obturate the remaining portion of the canals. ProRuth MTA should remain as a permanent part of the root canal filling.
Root apexification
- After applying the Rubber Dam, clean the root canal of sawdust and half-life products, using root canal instruments and irrigating the canal with solutions containing NaOCI.
- Dry the root canal system with paper points and place calcium hydroxide paste in the canal for a week to disinfect.
- After one week of applying Rubber Dam, remove CaOH from the root canal system using root canal instruments and irrigating the canal with solutions containing NaOCI. Dry the canal with paper points.
- Prepare the Prorut AM material according to the attached instructions.
- Using the supplied application probe, place the material into the defect area. Compact the ProRoot MTA material into the cavity using a small amalgam plunger and a cotton swab or paper points.
- Make sure you have placed the ProRuth MTA correctly using the x-ray. If an adequate barrier has not been created, wash the ProRut MTA material with water from the defect area and repeat the procedure.
- Place a moistened cotton swab into the cavity and seal the canal with temporary restorative material for at least 4 hours.
- After 4 hours, or during your next appointment, using Rubber Dam, inspect the ProRuth MTA material. The material must be hard. If it doesn't, wash it and reapply.
- Once the ProRoot MTA material has hardened, obturate the remaining portion of the canals. ProRuth MTA should remain as a permanent part of the root canal filling.
Root apex filling
- Provide access to the root apex and resect it using a surgical bur.
- Using an ultrasonic tip, prepare a Class I cavity to a depth of 3 to 5 mm.
- Isolate the work area. Dry the root cavity with paper points. Stop bleeding with a sealant sponge or other suitable material.
- Prepare the Prorut AM material according to the attached instructions.
- Using the supplied application probe, place the material into the defect area. Compact the ProRoot MTA material into the cavity using a small amalgam plunger and a cotton swab or paper points.
- Remove excess cement and clean the root surface with moistened gauze.
- Make sure you have placed the ProRuth MTA correctly using the x-ray. ProRuth MTA should remain as a permanent part of the root canal filling.
Pulp capping
- Using the Rubber Dam, complete the cavity preparation using burs at high speed with constant water spray.
- If caries is present, remove it using a round bur in the handpiece at low speed, or remove it using hand instruments.
- Rinse the cavity and surrounding area(s) with 2.6 – 5% NaOC1 solution. Bleeding can be controlled with a cotton swab moistened with sterile saline solution.
- Prepare the Prorut AM material according to the attached instructions.
- Using a small ball-tipped applicator or similar device, apply a small amount of ProRuth MTA to the exposed area.
- Remove excess moisture from the work area using a dampened cotton swab.
- Apply a small amount of glass ionomer light-curing liner material to cover ProRuth MTI and cure according to the manufacturer's instructions.
- Etch the remaining cavity surfaces with 34%-37% phosphoric acid gel for 15 seconds. Rinse thoroughly.
- Gently dry the cavity, leaving the dentin slightly damp but not wet. Apply adhesive. Cure according to instructions.
- Complete the restoration by applying composite material.
- At the patient's next visit, assess pulp vitality. The vitality of the pulp should be checked every 3-6 months using radiographs.
This is interesting: Purulent tonsillitis: photos, treatment, causes and symptoms
Features of application
Let's consider the main features of the product:
- The cementing mass is prepared in full compliance with the instructions in the instructions. Using a probe supplied with the powder, ProRoot is placed into the defect area and then compacted using special tools.
- Verification of adequacy of material placement using radiographs. If the position is incorrect, the material should be washed and reinstalled.
- After installing the mass into the prepared canals, a damp cotton swab is placed, after which the canal is sealed with a temporary filling for a period of 4 hours or until the next appointment.
- On the second visit, the dentist uses the rubber dam and examines the installed material, checking it for hardness. If the material has not hardened well, it should be washed out of the cavity and installation repeated.
In this case, the product remains in the root canals, like a layer of permanent filling, sealing them and protecting them from negative external influences.
The use of the product significantly increases the chances of restoring the problematic element of the jaw arch and extends the life of the filling mass.
Main characteristics of cement fillings, reviews from dentists and patients.
This publication contains all the most important information about the technique of unfilling tooth canals.
Here https://www.vash-dentist.ru/lechenie/zubyi/plombyi/obturatsiya-kornevyih-kanalov.html read about the indications for obturation of the root canals of teeth.
Instructions for mixing ProRut tooth root restoration material
Caution: ProRoot MTI does not cure as quickly as other cements. Careful mixing will make the material more flexible to use.
- Open the packet of ProRuth MTA material and place the material on the mixing pad.
- Tear off the tip of the microdose ampoule containing ProRut liquid and squeeze the contents onto a notepad next to the powder.
- Gradually mix the liquid into the cement using a ProRut MT-A mixing stick. Mix the material with the liquid for approximately 1 minute to ensure that all powder particles are moistened.
- If necessary (a spare ampoule is included or you can use distilled water), you can add 1-2 drops to mix the material to a creamy consistency. Discard any remaining liquid.
Note:
- Too little or too much liquid can reduce the strength of the cured material.
- ProRut MTA will harden within 4 hours, but working time is limited to 5 minutes. In case you need more working time, cover the mixed material with damp gauze to prevent evaporation.
Quantity:
5 x 1g. + 6 x 0.35g.
Kneading rules
Kneading does not cause any particular difficulties for a specialist, however, it requires a certain care and accuracy when performing.
To prepare the paste, you need to perform the following manipulations:
- Open the package of powder and pour it into a mixing container.
- Open the bottle of mixing liquid from the ProRoot kit and squeeze it out next to the powder mass.
- Using a mixing tool, carefully mix the liquid fraction with the powder for one minute.
- The resulting composition should have a uniform consistency and all its particles should be moistened.
- If necessary, add liquid from an additional ampoule or 2 drops of distilled water to the resulting mass.
It is recommended to stir the composition gradually and thoroughly, ensuring the uniform distribution of the liquid in the mass.
Then the cement will be pliable to work with and will harden evenly after application.
Filling the upper part of the tooth canal
The stages of filling include the following:
- Apply rubber dam, thoroughly clean the canal from sawdust and half-life products, using special tools to treat the space in the root and regularly spraying it with a liquid containing sodium hydrochloride.
- Carry out ultrasound treatment of the damaged cavity to the first class.
- Dry the area of the damaged tooth with special paper swabs and install it in the damaged area.
- Treat the channels in the nearest area against the detected defect.
- Prepare Prorut material in accordance with the instructions for use.
- Using a special dispenser-probe for placing Prorut from the supplied kit, apply Prorut to the area of the detected defect. Use a small plunger to compact the material into the damaged area, and also use paper and cotton swabs.
- Make sure that the drug has been placed correctly. An X-ray image will help you verify the correct placement of the Prorut. If it was not possible to create a strong barrier from the material, it must be washed with liquid from the damaged area and the application attempt must be repeated.
How to mix the material?
According to the instructions for use, mixing Prorut MTA consists of the following steps:
- open the container with the drug and transfer it to the surface for subsequent mixing;
- carefully open the container with the hardening liquid and place its contents next to the powder;
- carefully carry out the process of mixing the liquid component with the powder, use the mixing stick from the kit;
- Mix the two components for about sixty seconds to ensure mixing of the components and reliable moistening of the particles.
Hardening of Prorut differs from the similar process of other cementitious preparations. Careful and delicate mixing of the components of the product will make the material more convenient and manageable to use.
If the need arises, the Prorut MTA kit contains an additional capsule; you can add one or two drops to bring the drug to the desired consistency. You can also use distilled water. The remaining liquid must be disposed of.
Restoration of resorption
The procedure includes the following steps:
- Using a rubber dam, finish the work in the cavity using burs at high speeds with constant wetting with water.
- Install the filling temporarily.
- After a week from the date of surgery, extract CaOH from the tooth and carry out the necessary treatment.
- Rinse the cavity and its surrounding area with a five percent solution of sodium hydrochloride. If bleeding occurs, it should be controlled using a cotton swab treated with a sterile solution.
- Prepare Pro Root as prescribed in the instructions.
- Taking a miniature applicator with a ball-shaped nozzle, apply a small amount of the mixture to the exposed area.
- Dry excess moisture in the work area using cotton wool.
- Mix.
- Using the supplied probe, apply the drug to the operated area.
- Use x-rays to verify correct placement.
- Fill the cavity and place a tampon on it.
- During the subsequent procedure, check the degree of hardening. If it has not completely hardened, clear the channel of it and apply it again.
Useful tips
It is necessary to strictly adhere to the ratio of powder and liquid specified in the instructions. Excess or lack of moisture reduces the strength of the hardened material.
To avoid dehydrogenation, ProRut should be introduced into the operating area immediately after mixing.
Curing occurs in 4 hours. The working time with the composition during standard use does not exceed 5 minutes. If more time is required, you need to cover the mixed composition with moistened gauze.
To avoid discoloration of the tooth crown , the material should only be used in root canals or at the bottom of the pulp chamber.
ProRut MTA should be stored in a dry place, hidden from direct sunlight, with the lid tightly closed.
Notes for use
A lack or excess of liquid reduces the strength characteristics of the cemented element. The material goes through a hardening cycle in four hours, but its use in work does not exceed five minutes. If you need more time to work, you should cover the mixed preparation with gauze, preventing moisture from leaving the treated area.
In conclusion, it is worth mentioning the choice of this drug as a means of restoring the integrity of a damaged root.
Having such properties as rapid hardening in the moist environment of the oral cavity, plasticity and ease of use, restoration of damaged tissue and even increased growth of new cells, the material becomes an excellent choice for dental operations on the tooth and its root system.
Pro Root also allows you to completely close access to a channel susceptible to perforation. Its direct purpose is to restore tissue inside the tooth when it is damaged and close access to the damaged area.
Nuances of use
Despite the existence of general principles of technology for using the ProRut material, each individual clinical case requires a special approach to the procedure.
Let's consider the main nuances of work when performing various tasks.
Perforation restoration
When performing a perforation repair procedure, it is important to ensure that the installed material is positioned adequately and that it hardens after installation.
During treatment, several control images using x-rays may be required, as well as reinstallation of poorly “adhered” material.
A detailed description of the procedure for restoring perforation can be found in the article above.
Pulp capping
There are the following features of the pulp capping procedure:
- A light-curing material is applied on top of the applied ProRut material, which is illuminated in accordance with the technology proposed by the manufacturer.
- Dentin cavities are etched for 15 seconds using phosphoric acid. After pickling, everything is thoroughly washed.
- Then, everything is dried so that the dentin remains slightly damp, but not excessively. An adhesive is applied to the dental tissue and illuminated in accordance with the technology.
- The procedure ends with the application of a composite material.
After the procedure is completed, the patient is scheduled for another appointment, during which the vitality of the pulp is assessed.
Root apexification
- Rubber dam application.
- Treatment of the canal with boron, cleaning of sawdust and decay products, disinfection with NaOCI, drying with paper points.
- Placement of a disinfectant composition (calcium hydroxide) into the canal.
- Weekly break.
- Extraction from the canal (Ca(OH)2, disinfection of the cavity with NaOCI, drying with paper points.
- Mixing ProRut.
- Injection of material into the defect area, compaction using a plunger. (Condensation of the material can also be done using an ultrasonic nozzle).
- Verification using radiography of the correct application of ProRut.
- Place a moistened cotton swab on the ProRoot and place a temporary filling on top of it.
- Control of material hardness (check no earlier than after 4 hours).
- Obturation of the free part of the canal.
This is interesting: Types of local anesthesia in dentistry, methods of administration
Apical closure in one visit
There are many literature sources describing the technique of apexification using Ca(OH)2. Calcium hydroxide can be used to induce apexification in unformed apices or in apices destroyed by pathological processes. Using Ca(OH)2 is time consuming. In some cases, treatment takes up to two years, including repeated replacements of this material in the root canals. If the patient does not come to one of the follow-up visits, the method may fail.
MTA cement has been successfully used for apexification in one visit. The tooth is restored almost immediately. This is an excellent technique, suitable for both children and adults, as the following case demonstrates.
An adult girl aged 18 years had previously undergone root canal treatment on a central incisor. There was swelling and tenderness on the vestibular side. The crown was going to be replaced with a new one, but an x-ray showed that the filling material in the large-diameter root canal was undercondensed and the apex was wide open. The root canal was accessed. Gutta-percha was removed by Hedstrom files. After determining the length of the canal with X-ray confirmation, it was found that the apical region has a diameter of more than 120 according to the ISO standard - this is too large a diameter for controlled gutta-percha obturation.
The root canal is generously irrigated with sodium hypochlorite solution and minimally shaped to give the canal space a conical shape. Due to time constraints, no other work was performed at the first visit. The canal was filled with a preparation based on calcium hydroxide Ultracal, a cotton ball and a temporary filling made of IRM material were applied.
A week later, the canal was reopened (pain and vestibular swelling had disappeared) and the calcium hydroxide preparation was removed. To create a plug from MTA cement, we used a straight large diameter (diameter 1.20 mm) transfer tool from the MAP kit. Particular attention was paid to the position of the transporter in the apical region. During the insertion of the approximately 2 mm thick MTA plug, the tip of the vector was positioned at a distance of 1–2 mm from the root exit. Two or three portions of MTA introduced this time can be condensed using Dovgen pluggers of appropriate sizes. It was observed that the last portion did not reach the radiographic length of the root by approximately 1.5 mm. A brief exposure to ultrasound (5 sec) on the surface of the MTA cement using the ProUltra No5 ultrasonic attachment (Dentsply) displaced the material by the missing millimeters and led to its perfect position at the root.
A wet paper point was placed in the canal, the access cavity was closed with a cotton ball and a temporary filling made of IRM cement. The patient was asked to return later in the day (after four or more hours had passed) to ensure the hardness of the MTA cement. As expected, he became hard as a rock. The remaining part of the canal above the MTA cement was filled with thermoplastic gutta-percha using the Obtura system (Spartan Obtura).
Three months later, the tooth was asymptomatic and the periapical lesion had disappeared. Now you can install a new crown.
Root apex filling
- Provide access to the apical zone of the root using suitable burs.
- Rubber dam application.
- Treatment of the canal using an ultrasonic nozzle.
- Dry the canal with paper points; if there is blood in the canal, it should be removed with a sponge.
- Mixing ProRut.
- Introduce material into the apical zone using the included probe.
- Compact the ProRut with a plunger, remove excess material, clean the channel surface with damp gauze.
- Checking the correct filling of the root apex with material using radiography.
Creating a Pulp Barrier
To create a reliable pulp barrier, you must adhere to the following rules:
- Using a rubber dam, finish the work in the tooth cavity using burs at high speeds with continuous wetting with water.
- If caries has been detected, work should be carried out to remove it using a round bur at low speeds, or remove it manually using appropriate tools.
- Rinse the cavity and its surrounding area with a five percent solution of sodium hydrochloride. If bleeding occurs, it should be controlled using a cotton swab treated with a sterile solution.
- Prepare Prorut in accordance with the instructions in the instructions.
- Taking a miniature applicator with a ball-shaped nozzle, apply a small amount of Prorut to the exposed area.
- Dry excess moisture in the work area using cotton wool.
- Apply cushioning material, creating a coating for the drug, and carry out polymerization in accordance with the instructions in the instructions for it.
- Etch the remaining surface of the treated area with a 37% phosphoric acid solution for fifteen seconds. Then carefully treat the etching area.
- Drain the cavity as delicately and carefully as possible; the dentin should remain slightly moist. Then carry out polymerization.
- Restoration work is completed by applying a Spectrum-type composite, or using any analogue suitable for the parameters.
- At the patient's next visit, the condition of the pulp is assessed. Regular checks of her condition and vitality should be carried out every three months, monitoring her condition using data obtained from x-rays.