The quality of dental services 20 years ago left much to be desired. Fillings of dubious quality, loss of teeth, bridges that injure neighboring teeth - the list is endless. The reason for such unprofessional actions of dentists is unknown. Dentistry has changed since then. Specialists acquired the opportunity to gain new knowledge and improve their skills at seminars and conferences. Familiarity with new techniques makes life easier for the dentist and increases the comfort of patients.
These methods include dental photography. The method allows you to track your treatment history. This is a way of regulating relations between clinics and clients, increasing the level of trust in dentistry and raising their prestige.
Key Goals
Dental photography helps achieve the following goals:
- Documenting the stages of treatment provides the patient with information about the procedures performed by the dentist and allows him to evaluate the quality of the work.
- Preventing misunderstandings between patients and dentists.
- The images provide the doctor with the opportunity to consider the upcoming treatment and assess the deficiencies and parameters of the client’s teeth. Thanks to the images, he gets a complete picture of the color, structure and shape of the teeth. Taking into account the data obtained, it is easier for technicians to develop crowns and inlays.
- Correcting the dentist's omissions. The specialist analyzes the work and eliminates errors in a timely manner.
- The use of dental photographs at dental symposiums and master classes demonstrates the level of professionalism of the dentist.
- Compiling a portfolio.
Nikon offers the optimal solution for dentistry
Dental kit improves the effectiveness of therapy and surgery
Why Nikon?
1.The sharpest and most accurate optics in the world.
2.Matrixes with a resolution of up to 24.3 megapixels.
3.Natural color rendering.
4.Accurate focusing in any conditions.
Dental kit consists of three components: 1 camera + 1 lens + 1 set of R1C1 flashes.
Choose your suitable kit, which is already ready for use:
DSLR Nikon D750, D5600 or D7500 Lens Nikkor-AF-S MICRO-NIKKOR 105mm F2.8G IF-ED VR, Nikon 85mm f/3.5G ED VR DX AF-S Micro-Nikkor or AF-S MICRO-NIKKOR 60mm f /2.8G ED Wireless Macro Flash Speedlight Commander Kit R1C1 or Speedlight Commander Kit R1
=
Dental Kit
•Ready to use set
•Elements are optimally selected for work in dentistry.
•The flash and macro lens allow for high-quality intraoral photography.
•Nikon technologies simplify your work and help improve the efficiency of therapy and surgery.
Kits included in the offer:
Nikon D750 + Nikon Speedlight Commander Kit R1C1 + Nikon 60mm f/2.8G
Nikon D750 + Speedlight Remote Kit R1 + Nikon 60mm f/2.8G
Nikon D750 + Speedlight Remote Kit R1 + Nikon 105mm f/2.8G
Nikon D3500 Kit 18-55 II AF-P + Nikon Speedlight Commander Kit R1C1 + Nikon 85mm f/3.5G ED
Nikon D3500 Kit 18-55 II AF-P + Nikon Speedlight Commander Kit R1C1 + Nikon105mm f/2.8G ED
Nikon D3500 Kit 18-55 II AF-P + Nikon Speedlight Commander Kit R1C1 + Nikon 60mm f/2.8G ED
Nikon D5600 Kit 18-55 VR AF-P + Nikon Speedlight Commander Kit R1C1 + Nikon 85mm f/3.5G ED
Nikon D5600 Kit 18-55 VR AF-P + Nikon Speedlight Commander Kit R1C1 + Nikon105mm f/2.8G ED
Nikon D5600 Kit 18-55 VR AF-P + Nikon Speedlight Commander Kit R1C1 + Nikon60mm f/2.8G ED
Nikon D7500 Body + Nikon Speedlight Commander Kit R1C1 + Nikon 85mm f/3.5G ED
Nikon D7500 Body + Nikon Speedlight Remote Kit R1 + Nikon 85mm f/3.5G ED
Nikon D7500 Body + Nikon Speedlight Remote Kit R1 + Nikon 60mm f/2.8G ED ED
Nikon D7500 Body + Nikon Speedlight Remote Kit R1 + Nikon105mm f/2.8G ED ED
Nikon D7500 Body + Nikon Speedlight Commander Kit R1C1 + Nikon 105mm f/2.8G ED ED
Nikon D7500 Body + Nikon Speedlight Commander Kit R1C1 + Nikon 60mm f/2.8G
Why the kit?
•All parts are optimally suited to dental needs.
•All items are supported by manufacturer's warranty and service.
•Favorable terms of purchase*.
*For details, please contact our sales consultants.
Call us by phone 8 (800) 555-24-04
Or come to the address: Moscow, st. Bolshaya Semenovskaya, 11 building 5 (territory of the Sokoliny Dvorik business park). We work for you every day:
Mon. — Fri. from 10:00 to 20:30
Sat. — Sun. from 11:00 to 18:00
We are waiting for you for shopping!
Working with pictures
Particular attention is paid to standardization and archiving of images. Information is stored from the moment of the client’s first visit to record dental problems until they are eliminated.
Standardization
The photograph is taken on a plain background. The camera is fixed at face level. The patient looks straight ahead.
Standard types of photographs:
- smiling face;
- calm face;
- smile;
- smile on the right side;
- smile on the left side;
- front teeth straight, left, right;
- close-up of front teeth straight, left and right;
- bite planes of the upper and lower jaws;
- upper and lower incisors in clear view.
At the time of the first visit, up to 8 photographs are taken in order to capture important moments for future work. At the discretion of the doctor, an additional series of photographs is taken.
Particular attention is paid to adjusting the thermal mode when shooting. Temperature is measured on the Kelvin scale. To adjust the color temperature, white balance is adjusted in the digital camera software.
A color scheme that is comfortable for the human eye is selected. Natural photographs with optimal color rendition are taken at a color temperature of 5300-5500 K.
Archiving
To work correctly with photos, you need to install optimizing software. Similar software is included with the equipment. The user views the images and consults the patient without additional time.
Archiving of photos is carried out using special programs. FotoStation helps you quickly sort your photos. Special search filters using keywords allow you to quickly find data for each client.
The program is not adapted to Russian-speaking audiences. Active negotiations are underway on the Russification of software.
Since a specialized program is not available to domestic clinics, specialists have to get out of the situation using other methods. A folder is created on the clinic’s shared resource with restricted access to the photo deletion option. In the folder, each doctor places photos of his patients, sorting them by last name. A client base of dental images is gradually being formed, access to which is provided to the entire clinic team. Image storage formats are JPEG and RAW.
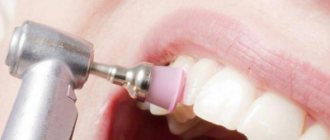
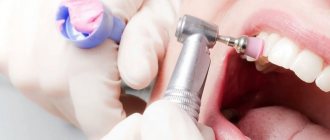
Camera settings for taking pictures of teeth (dental photography)
- Under your control is the diameter of the hole in the diaphragm through which light enters the matrix and captures the image on it. The diameter is called “aperture” or “focal number” (f-number). The lower the focal number, the larger the hole diameter. As the focal number increases, so does the depth of field. Recommended focal number values: — shooting a face — f8; — shooting lips and teeth — f13-16; — shooting inside the oral cavity — f22-29.
- Set ISO (light sensitivity) to 100 or 200,
- Shutter speed - 1/160,
- White balance - automatic or "flash".
Technical equipment
For fast shooting mode in high quality, the room is properly equipped:
- retractors;
- lamps with UV radiation;
- occlusal and lateral crystalline mirror;
- contrastor;
- cling film to protect the lens during operation.
The assistant is responsible for ensuring the operating condition of the equipment. The dentist is responsible for the quality of the images and settings. Proper distribution of responsibilities helps optimize the shooting process.
It is necessary to prepare the shooting location:
- choose a background (stage table or black matte fabric);
- prepare whatman paper and cardboard.
Lens, camera, macro flash
The clarity of the pictures depends on the quality of the digital camera. It is recommended to use a DSLR camera, which allows you to capture every detail when shooting.
European experts prefer the 70D technique. The camera is suitable for working in rooms with different levels of illumination and is capable of capturing an object from different angles without losing the quality of the images.
Characteristics of the flash for macro photography Canon Macro Ring MR-14EX:
- double lamps for brightness;
- LED bulbs;
- ring flash ensures even illumination;
- reliability and performance.
When choosing a lens, criteria such as quality, ease of use, functionality and affordability are taken into account. The listed characteristics are specific to the Canon EF 100mm f/2.8 USM Macro Lens Review.
Retractors, mirrors, contrastors
Full shooting is not possible without additional equipment.
Contrastors are specialized devices for creating a dark background. With their help, the shooting is focused on the part of the dentition of interest. The black background highlights imperfections. It is recommended to choose anodized aluminum products that are suitable for steam and high pressure sterilization. Treatment is carried out with a soap solution. Chemicals damage the black layer.
Mirrors – used for intraoral photography. Glass, 3 mm thick, is coated with platinoids. Reflects light effectively and is not prone to oxidation.
Mirrors are fragile and require careful handling. The product is processed and sterilized separately from other equipment.
A dental photograph requires at least two mirrors – a lateral and an occlusal one.
Retractors – provide visibility. Devices in the form of hooks, plates, etc. used to retract soft tissues and hold the mouth open. Due to its soft structure, it does not injure mucous membranes.
Shooting technique
Macro photography of the inside of the mouth is a challenging task. To implement it, you must comply with the following rules:
- shooting in manual mode without autofocus;
- installing a contrastor at a distance that prevents glare;
- heating the mirror with hot water before taking photographs to prevent fogging;
- the nose does not fit into the frame with the upper front teeth;
- the dental arch occupies the entire area of the image;
- saliva is removed and chewing surfaces are blown;
- The lighting turns on and the flash is removed.
Dental photography is the solution to dental problems.
The path to professional dental photography. Thomas Henninger. Part I
The path to professional dental photography
Thomas Henninger (part 1)
A good dental photograph is not determined by the price at which the camera is purchased. Moreover, the use of certain techniques and aids can determine whether a photo looks professional or not. Dental photography is generally characterized as demanding. Along with the problem of depth sharpness, the pitfalls of macro photography also include the difficult situation with lighting in the oral cavity. Naturally, here too a certain amount of practice makes a master. To ensure that you are best equipped to perform successful dental photography, I will cover in this article and the next part the criteria for purchasing a camera and introduce several techniques and aids.
As a dental lighting specialist, I face daily questions: “Can I take good dental photos?” or “Which camera is the best?” But the answer to the question “Which car is the best?” depends on individual requirements and cannot be answered in one sentence. I will be happy to describe further a situation where a doctor, who had professional equipment for 4,000 euros, during one of my photography courses looked with envy at his neighbor in the course, who, with the help of his compact camera for 300, - euros, took significantly better pictures. This example shows that the cost of purchasing a camera is not the same as the quality of the images. On the contrary, it is compact cameras that, due to their small lens diameter, provide very good depth sharpness. The “Law of Optics” says: the smaller the lens diameter, the better the depth sharpness. From this perspective, a small lens on a compact camera can outperform a large DSLR lens in depth sharpness. (ill.1) There are other arguments in favor of compact cameras.
Ill.1. On the left is an unsharp shot with a DSLR camera, on the right is a shot with a compact camera.
Weight
The camera in dental photography must be equipped with an appropriate lighting or flash system. A ring light system for compact cameras is significantly lighter than a ring light or flash system for a DSLR camera. In addition, to take photographs with a SLR camera, you usually need a 100x macro lens, which adds 600 grams of weight to the system alone. When it comes to weight, a small compact camera definitely beats a DSLR camera.
Convenient use
Overall, the camera should fit well in your hand. Just as we differ from each other, so do the camera models on the market. An unambiguous recommendation is impossible - tests must be carried out. It is necessary to pay attention to the fixation of the lighting system or flash. Manufacturers fix classic flash systems using a “hot shoe” and significantly shift the camera’s center of gravity. Therefore, the use of the camera must first be tested with all attachments, as it will later be used in everyday practice.
Permission
Both compact models and existing DSLR models have a resolution of approximately 10 megapixels. For everyday standard documentation, this is almost too good. If the photo is enlarged to poster format, 4 to 6 megapixels is usually enough to get good quality. A common misconception is wanting high resolution so that you can project the images greatly enlarged on the wall during presentations and training. But the quality here does not depend on the resolution of the camera or computer, but only on the projector, in other words, on the video projector. And the latest high-definition digital TV (HDTV) devices can provide relatively low resolutions. For a camera like HDTV 720p, this is 1280 x 720 or 0.9 megapixels, and even for HDTV with 1920 x 1080 pixels, the resolution is only about 2 megapixels (Table l). Nothing will change in this and the foreseeable future. This means that for a 10 m wide projection at Audiomax, camera images from 3 megapixels will be quite sufficient.
Of course, a new acquisition must comply with the existing state of the art and always have reserves, for example if a certain detail in a survey photograph needs to be enlarged. For everyday documentation, it makes sense to reduce the camera's maximum resolution. This saves, in addition to memory space and processing time, also time during transfer, especially when the image must be sent by E-mail without preliminary processing using a separate program.
| Device | Permission | Norm |
| Intraoral camera | 0.4 megapixels | PAL |
| TV picture | 0.4 megapixels | PAL |
| Computer monitor | 0.5 megapixels | SVGA |
| Computer monitor | 0.8 megapixels | XGA |
| TV picture (future) | 0.9 megapixels | HDTV 720p |
| TV picture (future) | 2 megapixels | HDTV 1080i |
| Digital camera | 8 - 12 megapixels | |
| Table 1: Comparison of the resolution of various devices that produce images | ||
The larger the matrix, the better the digital camera
A digital camera has an electronic sensor (sensor) instead of film, which takes incoming light and turns it into a digital photo. Digital SLR cameras typically have larger sensors due to the larger lens diameter. This has a positive effect on the light sensitivity of the camera chip. If individual pixels are packed too tightly together on a small chip, this will cause skipping of charges at high gain. When taking pictures under poor lighting conditions, this effect appears as noise in the picture. In simple terms, this means: a large sensor begins to make noise later in low light.
Considering space and cost, a compact camera will generally have a smaller sensor. On the contrary, a digital SLR camera is usually equipped with a larger sensor and therefore produces high-quality images even in poor lighting conditions. But since during dental photography we still use an additional flash or constant light, this drawback is less pronounced.
DSLR vs Compact
When asked, “Which is better, a DSLR or a compact camera?” the photographer would constantly answer, “Of course, mirrored.” There are several reasons for this. One of them relates to the “analogous world”, when compact non-DSLR cameras were completely unsuitable for dental photography. This was due to something called parallactic misalignment, which occurred when an object was too close in front of the camera lens. If you look through a search engine, the visible image is constantly shifted to the side relative to what was visible through the lens or was then displayed on film. Camera designers simply assumed that the subject was usually at least two meters away from the camera. The consequence of this was that the photographer could never be sure which part of the picture he was photographing.
Today, the argument regarding parallactic displacement is no longer relevant: the image that appears on the display of a digital compact camera always exactly matches its version on the sensor and, therefore, the picture that is then visible in the image. Moreover, compact cameras have an advantage over most DSLR models, namely, they show a live image on the display. In a DSLR camera, the sensor is covered with a mirror, which is due to the design, due to which the picture appears on the camera display only after shooting. Thus, in most cases the photographer is forced to look through an optical search engine, which again affects the ergonomics in the photographer’s workflow (Fig. 2 and 3).
Ill. 2 and 3: An example of ergonomics when working with a DSLR (left) and a compact camera (right).
A digital compact camera also has the advantage that in several models the display can be flipped horizontally (Fig. 4)
Ill. 4 Compact camera with movable display.
This feature proves to be very practical for images of the upper and lower jaw. And the ability to remain in eye contact with the patient during the image is perceived by the user as convenient. Thus, weight and ease of use, as well as ergonomics, speak in favor of a compact camera.
The undeniable advantage of mirror technology is the clarity of the image in the search engine, despite the lack of ergonomics. It is even suitable for determining depth sharpness. However, in everyday practice this is not generally required. The defining thing for a photographer is to shoot quickly and easily. A medical practice is not a photography studio. It's more about working quickly (the motto is: aim, press a button and the result should be good) and making sure that any team can take pictures. The autofocus function in modern cameras has developed so much that, if used correctly, there is great confidence that the pictures will be sharp.
Find the right sharpness
There is one trick to help with problems with dental photographs that are not sharp enough. Most cameras come from the factory with settings when
The level of sharpness is determined independently based on contrast indicators. This is completely unsuitable for occlusion overview shots, for example. In most cases, the sky is reflected very clearly/sharply, and the dentition, the main purpose of the image, is practically invisible. In almost all camera models it is possible to change this autofocus setting. If instead of the “auto” option you select “middle” (central), the camera will from now on sharply reflect the fragment located exactly in the center. This is usually indicated by a small square in the center of the display. The trick is to use this marking to precisely mark a point that should later be sharp in the picture. Then you can only press the start button lightly, without pressing too hard, so that the camera only adjusts the sharpness, but the shooting still starts. The sharpness setting is in most cases determined by the green border of the square. Then the exact fragment of the image is selected, this is how the subsequent image should look. It is important that your finger remains on the half-pressed shutter button. Only when the part of the photo matches your desires should you press the button all the way to take a photo. Provided there is sufficient lighting, this technique guarantees dental images with stable sharpness.
And if many things speak in favor of a compact option, a DSLR camera system may, of course, also be advisable. For example, if the photographer already has similar equipment with many (expensive) lenses. Or in private life he likes to walk in the mountains and for this he often needs a very good telephoto lens. Or he likes landscape shots with extreme angled areas. In this case, it is advisable to purchase an appropriate digital camera in order to be able to continue using existing lenses. However, attention should be paid to the apparent lengthening of the focal length in analog lenses.
Ideal matrix
It would be ideal if the matrix had the format of a transparencies or a small-format photograph. But these full-format matrices are very expensive and therefore are available only in the best models of some manufacturers. Typically, chips are smaller than small format snapshots. Analog lenses are designed for small format or full format images, however, they can be combined with smaller matrices without any problems. But in this case the focal length of the lens changes. Therefore, the technical specifications of a digital SLR camera always indicate an extension of the focal length. Using this extension, the effective focal length can be calculated by simply multiplying the focal length of the lens by a factor. With one and a half lengthening of the focal length and a 100-macro lens, the same fragment of the image is obtained as with a focal length of 150 mm in a small format photograph. The corner zone of the lens is, as it were, limited and the telescopic effect is enhanced.
The following table contains the current advantages and disadvantages of DSLR and compact cameras, with + meaning “good”, ++ “very good”, +++ “very good and only possible here”, (+)* depending on the model and not good or impossible.
| SLR camera | Compact camera | |
| Weight | — | ++ |
| Depth Sharpness | + | ++ |
| Ergonomics | + | ++ |
| Live picture display | + | ++ |
| Folding display | — | +++ |
| Optical search engine | ++ | — |
| In the macro zone, variable focal length | + | +++ |
| Interchangeable lenses | +++ | + |
| Image quality | ++ | + (+)* |
| Characteristics of "noise" | ++ | + |
| Delayed start for photographers. | ++ | + (+)* |
| Price | + | ++ |
Author: Thomas Henninger
Doctorseyes
Why do you need a photo protocol?
Currently, the photo protocol is the most important section of diagnostics in the dental field. High-quality photographs help dentists study both the condition of the client’s teeth and gums, as well as the harmony and aesthetic features of his face and jaws. Photographs taken inside the mouth are required to study the characteristics of the bite, the presence of various defects and lesions of the tooth enamel on the teeth. Standardization of the photography procedure allows us to record the initial situation in the oral cavity, document all stages of the treatment process, correctly assessing the achieved results.
Having examined the initial state of the patient’s oral cavity and intermediate changes in the image, the dentist can make a reasonable decision - whether to continue working according to the originally planned plan or change it and adjust the treatment method. In dental practice, it is not uncommon for dental clients to refuse intended and planned long-term treatment because they do not notice positive changes or visual results. And receiving from the dentist an electronic copy of every digital image he has taken allows the patient to track the dynamics of changes in the condition of his teeth, which clearly confirms the effectiveness of the treatment.
How is photo protocol useful for dentists?
High-quality enlarged photographs of the oral cavity will allow the dentist to see the exposed tooth root, the darkening of the gums next to the crown, and the violation of the marginal seal of the filling. Since the human eye is imperfect and vision can deteriorate, people in some professions sometimes have to use microscopes, glasses, binoculars and cameras in their work. Such devices have been used in various countries for many years by physicists, biologists, criminologists, and dentists.
When working with a patient’s teeth, dentists have to perform various procedures on them - drilling out caries, putting fillings, straightening the dentition, correcting the bite. And photographs of the teeth taken before the start of the procedure and after its completion will allow the patient to personally verify that the treatment was successful, and the doctor to receive photo protocols for his portfolio. Such photographs are pasted into patients’ medical records.
For many years, photographic records have been indispensable products for dentists, as well as part of the medical documentation in clinics. Their creation by a doctor indicates the use of advanced progressive technologies that allow total control over treatment. In photographs you can clearly see the condition of tooth enamel and soft tissues, assessing the level of aesthetics of the dentition. Photo protocols facilitate communication between orthopedic dentists and dental technicians, who are not directly involved in dental treatment in the clients’ mouths, but only in the manufacture of veneers, crowns and removable orthopedic structures. Dental technicians do not study people's mouths; they use information provided to them by prosthodontists. And in order for this information to be as complete and clear as possible, it is necessary to use the capabilities of modern digital photography.